This article aims to provide the readers with a step-by-step tutorial in creating a design and simulation for a simple 500kWp grid-connected solar PV project. This solar PV design tutorial will utilize PV*Sol Premium 2019 in doing the calculations, solar panels arrangement, shading analysis, financial analysis and preparing the reports or project presentation.
Please note that this is only an example project and we are not affiliated to any brands, companies or any public personalities. We also do not own any properties mentioned in this article. This is purely for educational purposes only.
Requirements for Solar PV Project Design
A laptop or desktop computer with a Windows operating system
PV*Sol Premium software – if you have not installed this software yet, please check this link below for your reference.
Solar PV Design – Project Information and Specifications
For this particular example, the project has been considered with the following specifications:
Project Location: Ususan, Taguig, Metro Manila, Philippines
Map Coordinates: 14.5319884,121.0661779
Type: Grid-Connected or On-Grid Solar PV System
Total Kilowatt-Peak Capacity (DC side): 500.76kWp
Total Kilowatt Capacity (AC side): 450kW
DC/AC ratio: 1.1128
Total number of solar panels: 1284 pcs.
Module Capacity: 390Wp
Type of solar PV module: Cheetah Perc HC72M 390Wp V (Available on the PV*Sol Software)
Total number of inverters: 9 pcs.
Inverter Capacity: 50kW
Type of Inverter: ABB TRIO-TM-50.0
No. of MPPT’s per Inverter: 3 MPPT’s
Inclination Angle: 20 degrees
Orientation: 180 degrees or South-facing
Module arrangement: Portrait 2 x N (where N = any positive integer :D)
Height of Module’s Lowest Point to Ground: 1 meter
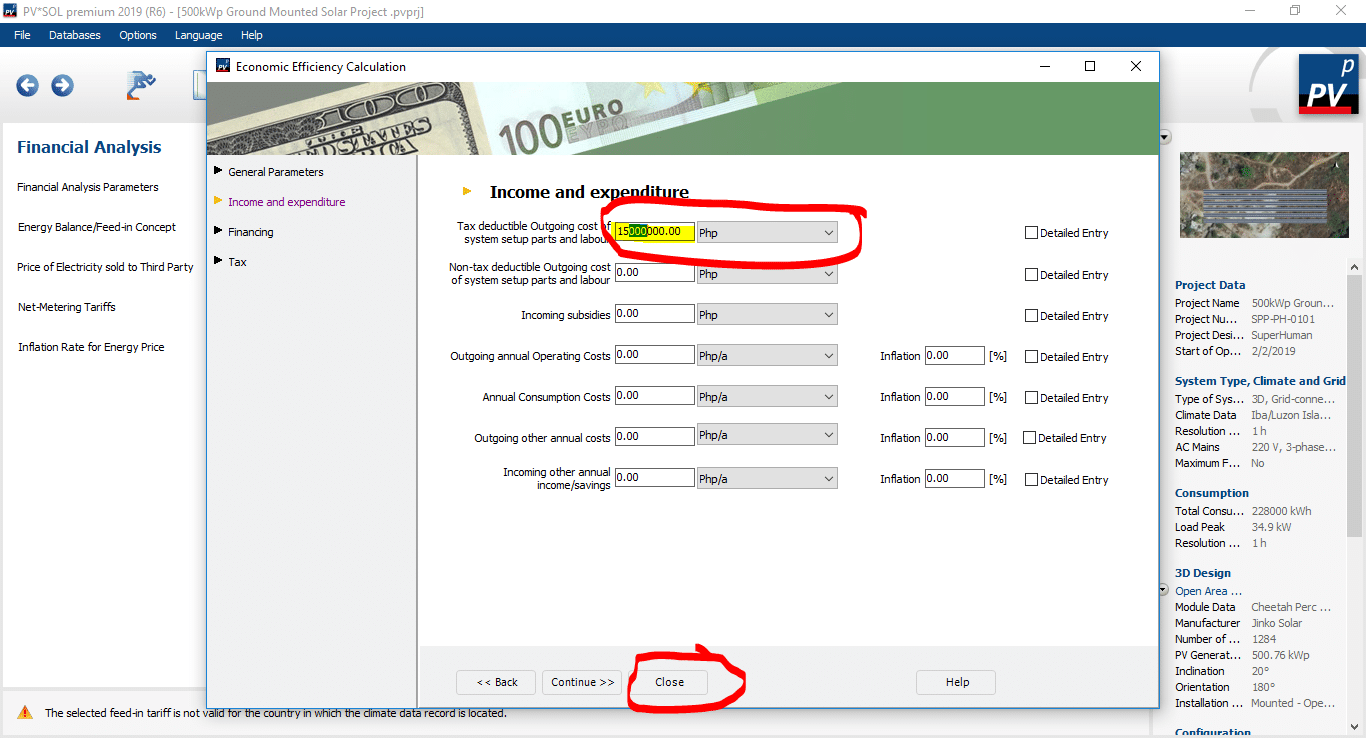
Total Project Cost: Php15,000,000 only (~290,300.00 USD)
Example Solar PV Design Instructions
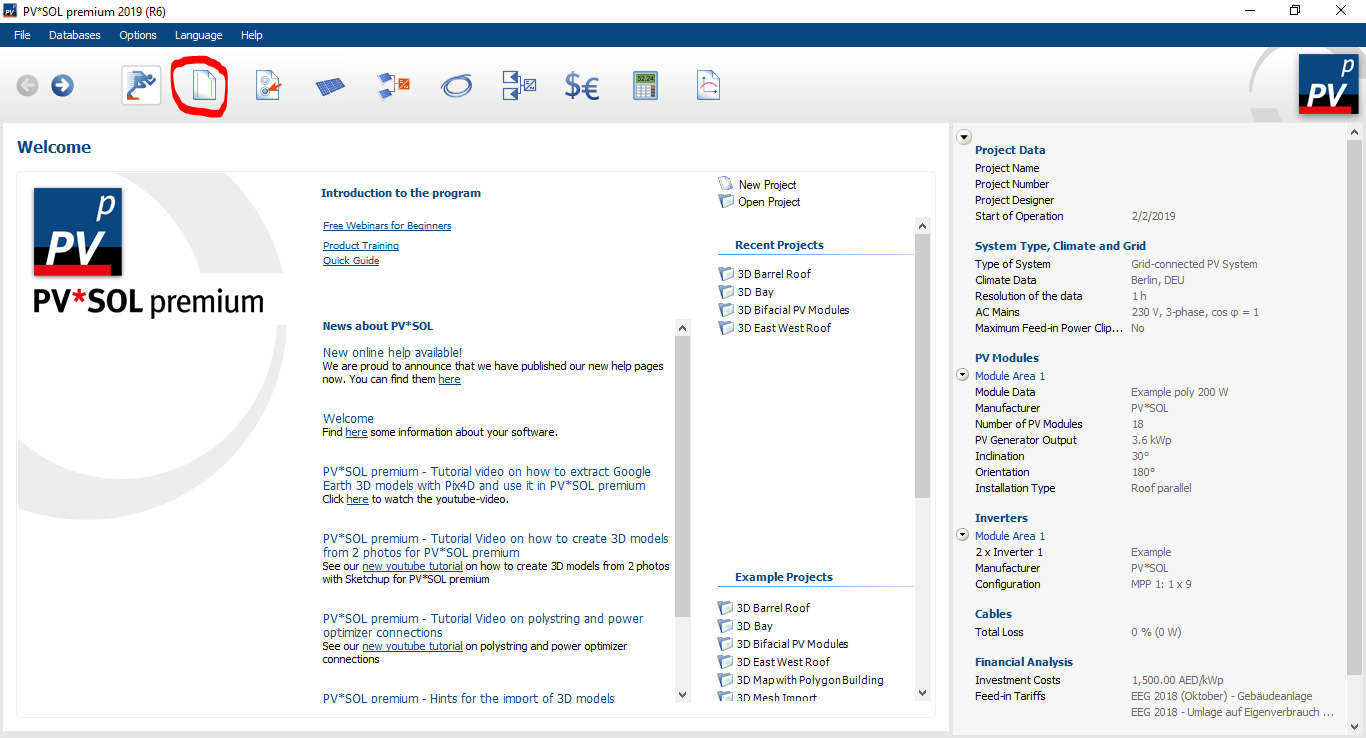
First, you need to open the solar PV design software on your computer. Then click the “Project Data” icon as marked on the screenshot above.
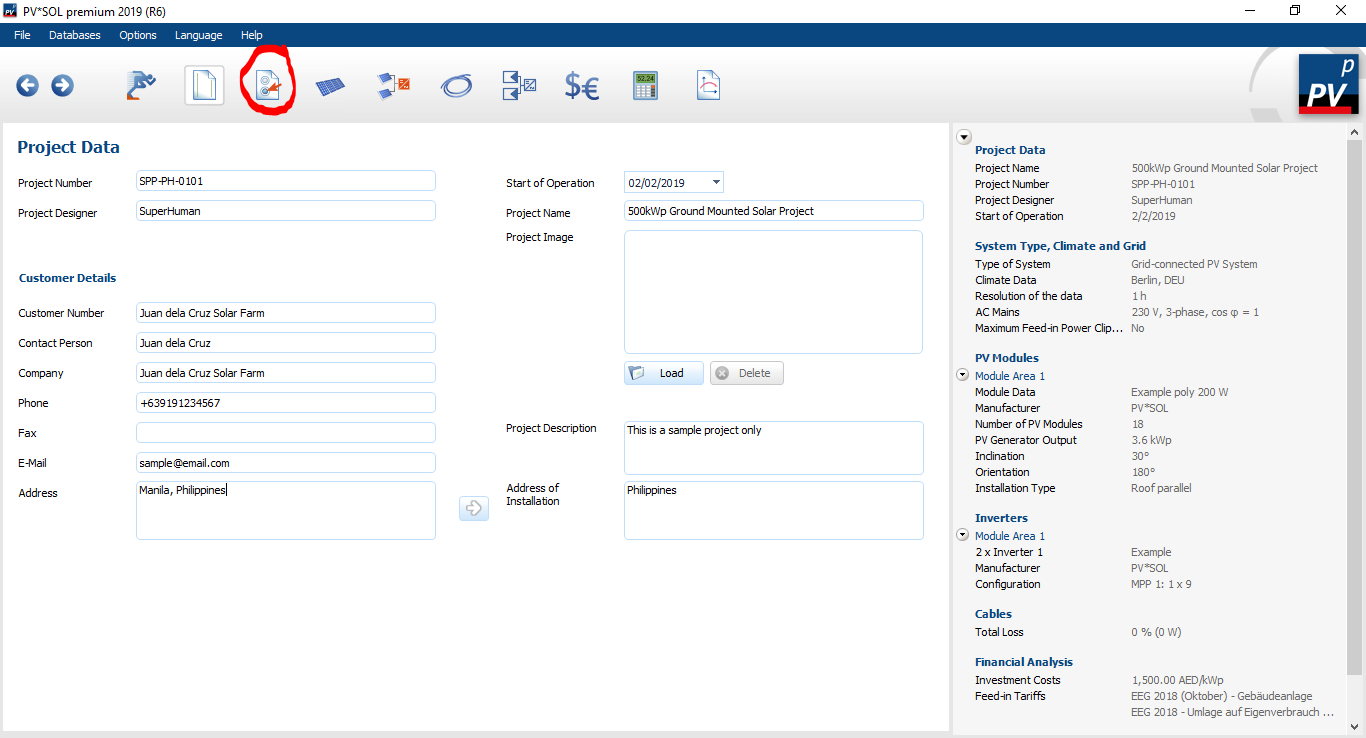
Fill in the details you want to include in the project in the Project Data section.
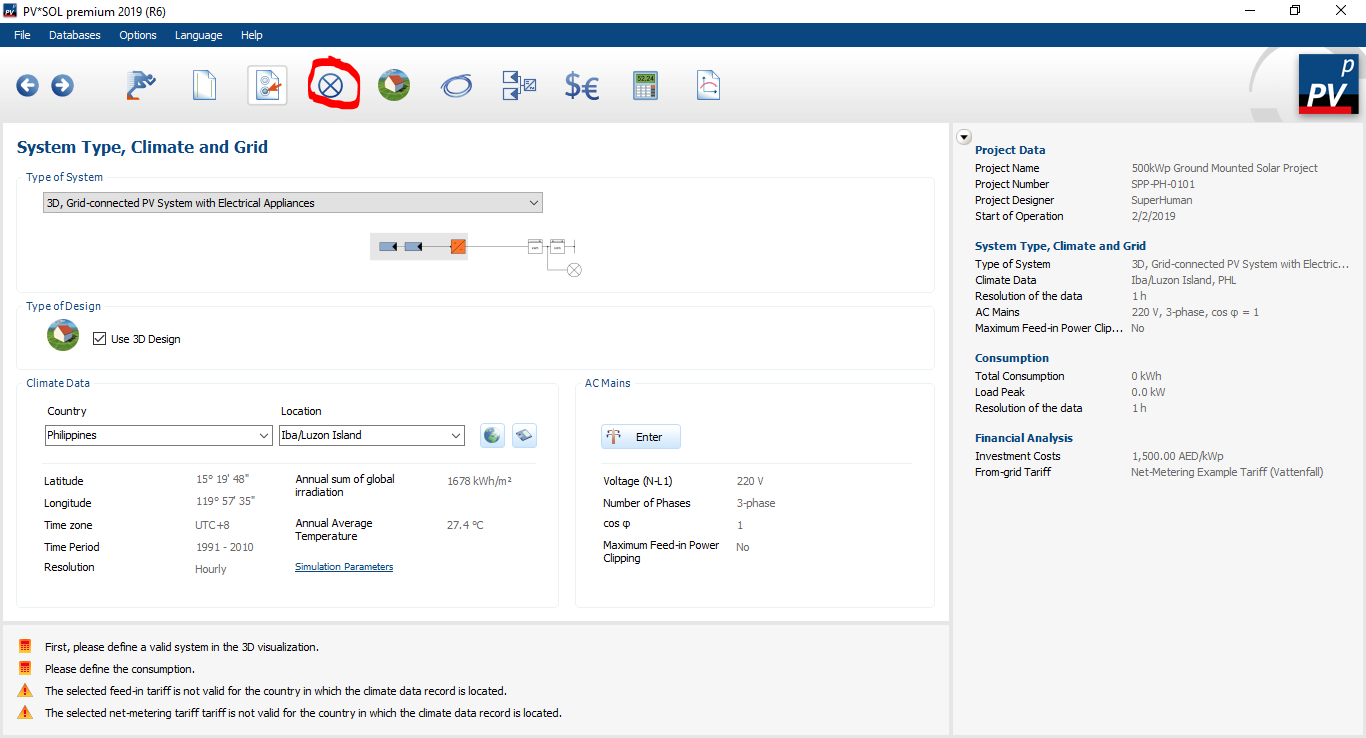
After filling in the form, click the next icon, which is labeled as “System Type, Climate and Grid”.
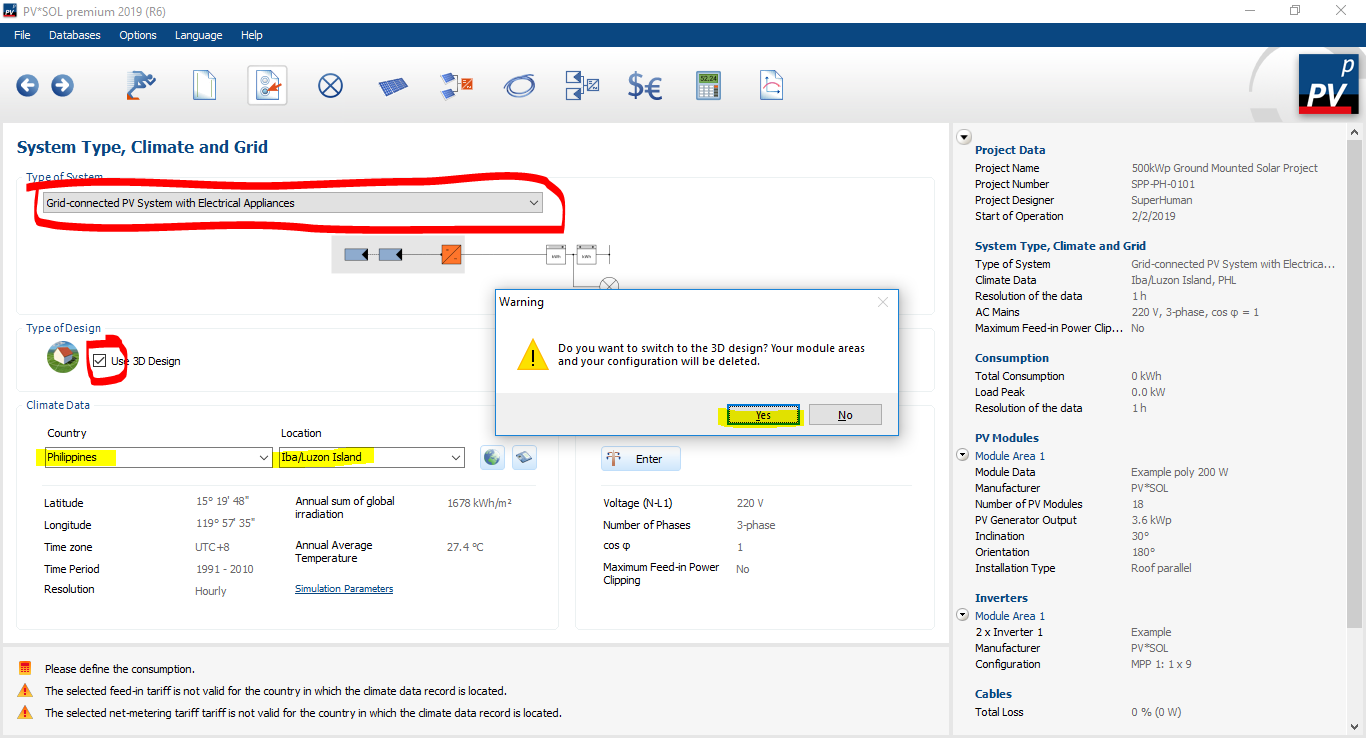
In this section, select “Grid connected PV System with Electrical Appliances”, click the tick box for 3D Design and choose Yes when prompted with a warning message. Lastly, choose Philippines as the country and Iba/Luzon Island as the location.
This will determine the annual sum of global irradiation to be used by the software to simulate the energy yield of the solar PV project.
In this case, we will get 1678kWh/sq.m. as the maximum annual irradiation.
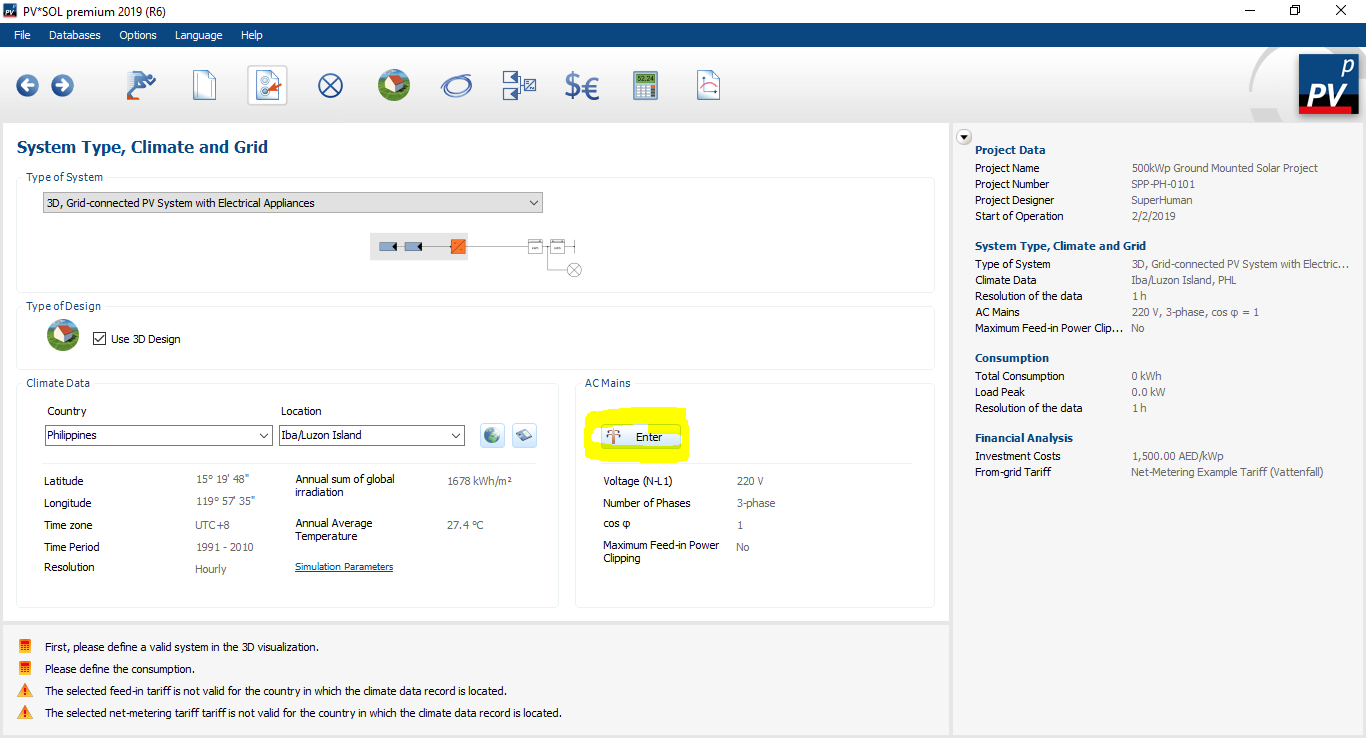
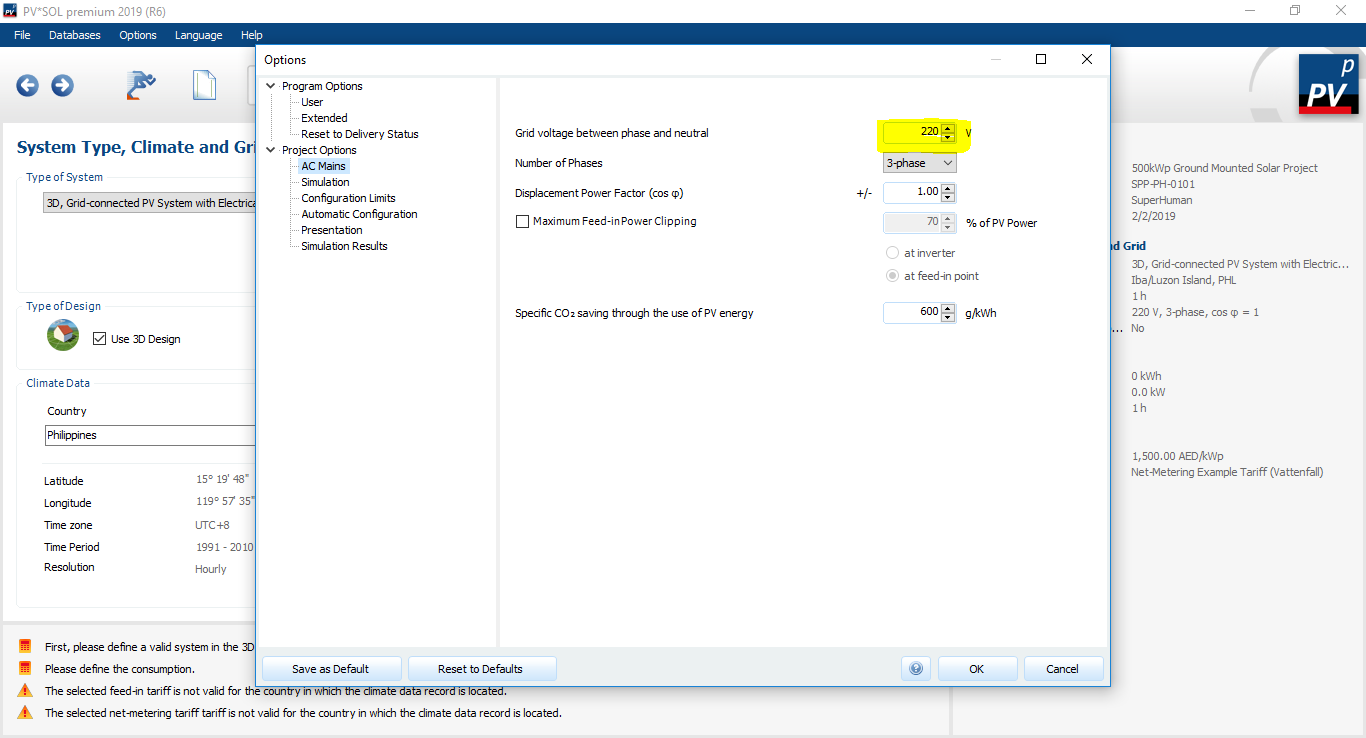
On the AC Mains section, click “Enter” then fill in the form with the correct voltage level as per the country standards.
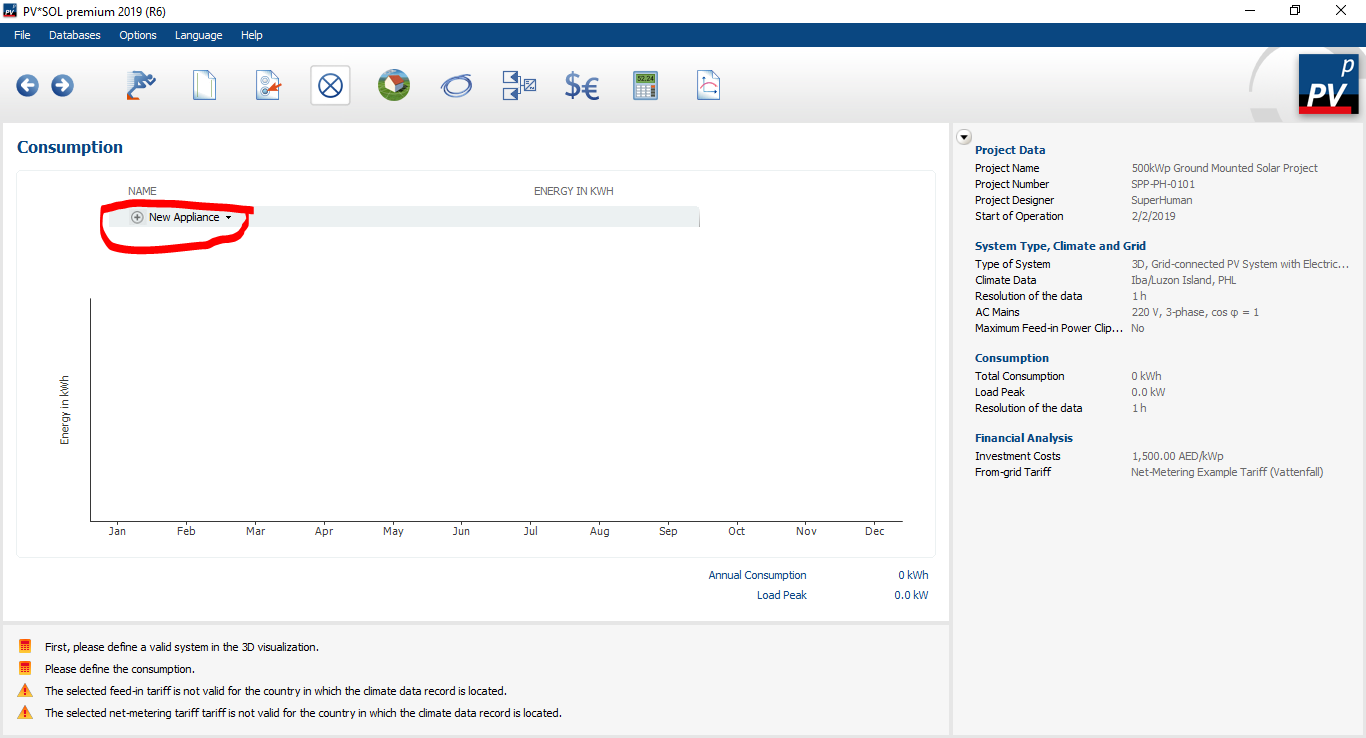
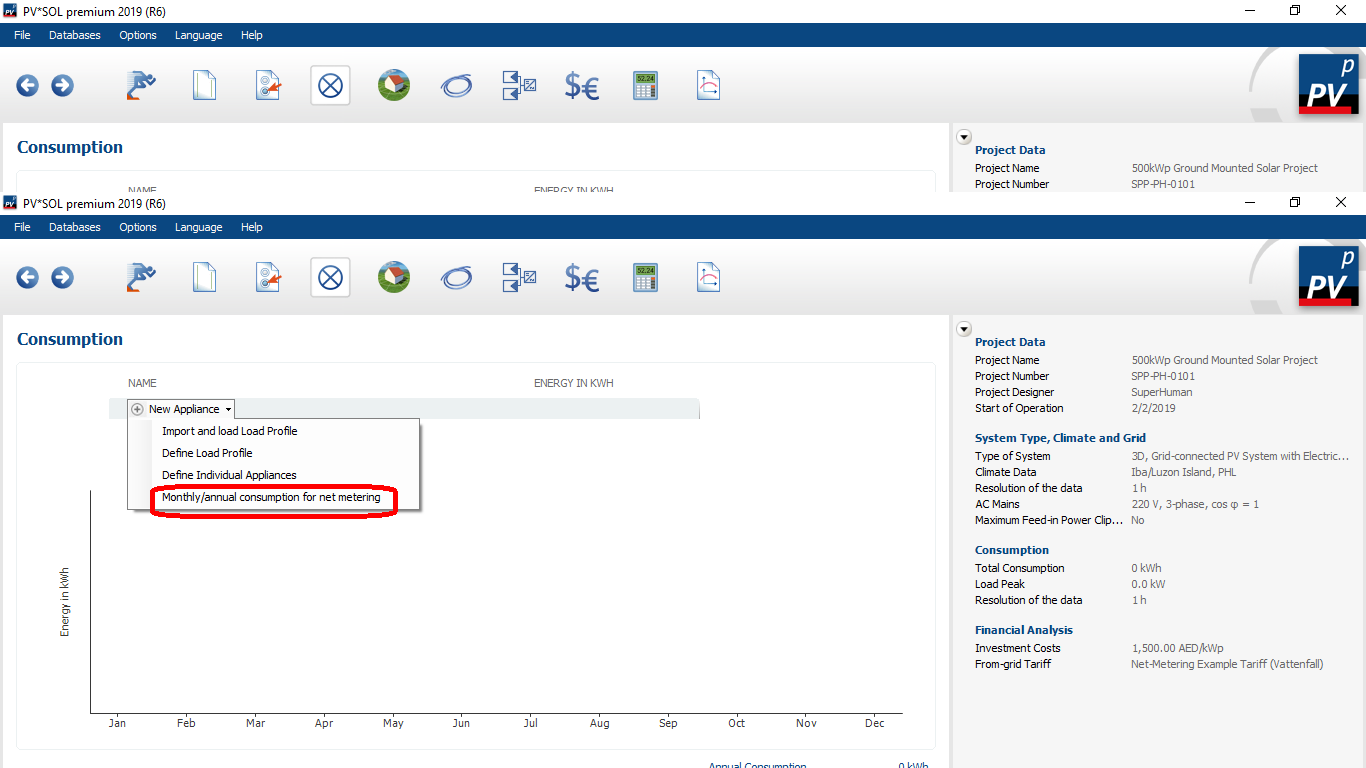
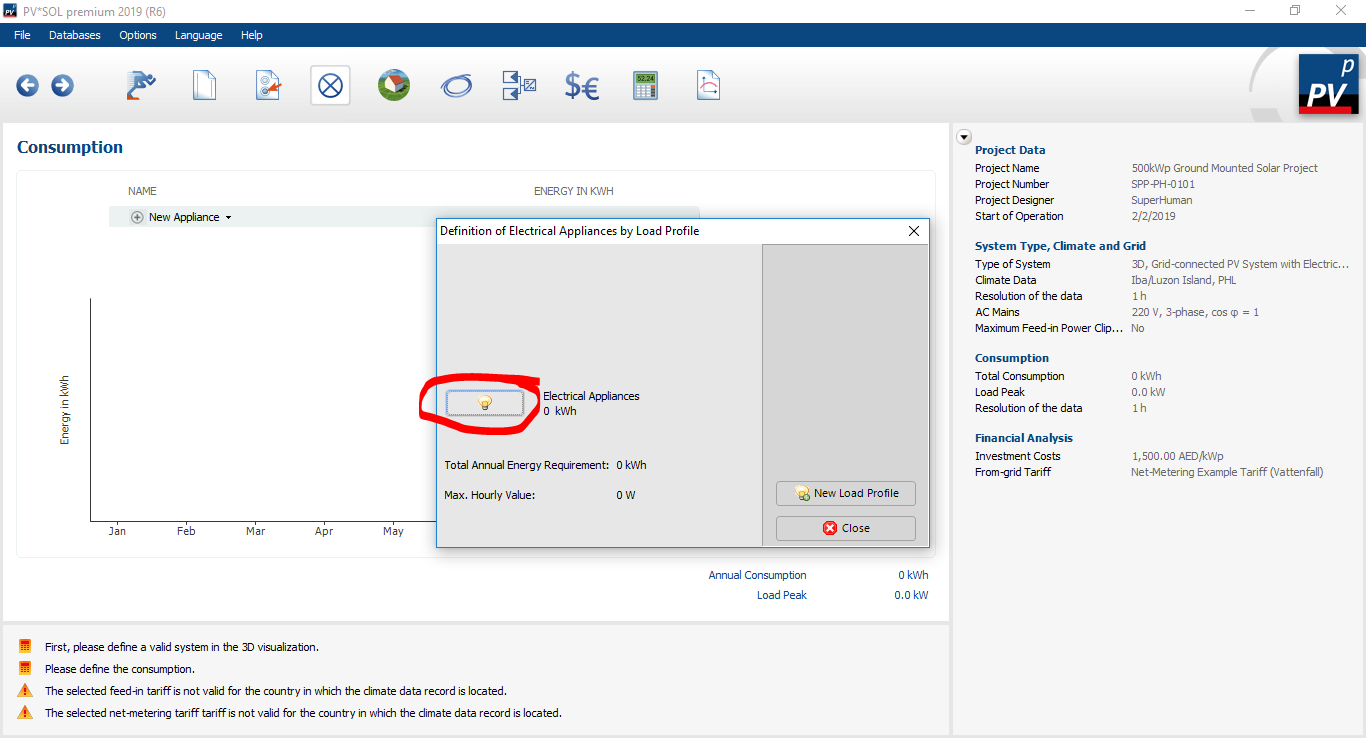
Click OK. Then, follow the steps below for the Consumption section where you will enter the energy being drawn by your load (equipment, appliances, lighting, etc.).
Energy Consumption
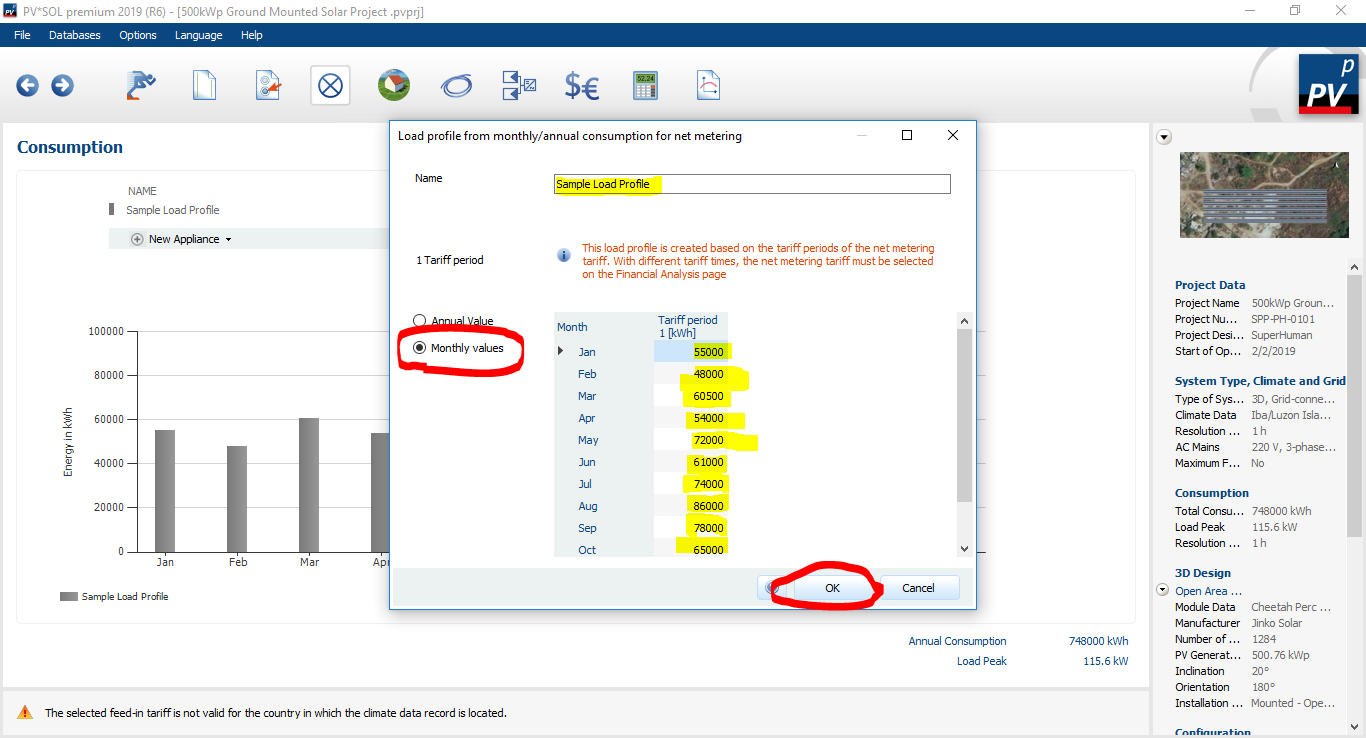
As for this example, here is the Load Profile data that we can use to simulate the energy consumption of the project’s load. You may create or enter any data for the monthly kWh consumption, but if you want to have the same data as the example project, you may copy the following:
Load Profile
January – 55000 February – 48000 March – 60500 April – 54000 May – 72000 June – 61000 July – 74000 August – 86000 September – 78000 October – 65000 November – 53000 December – 41500
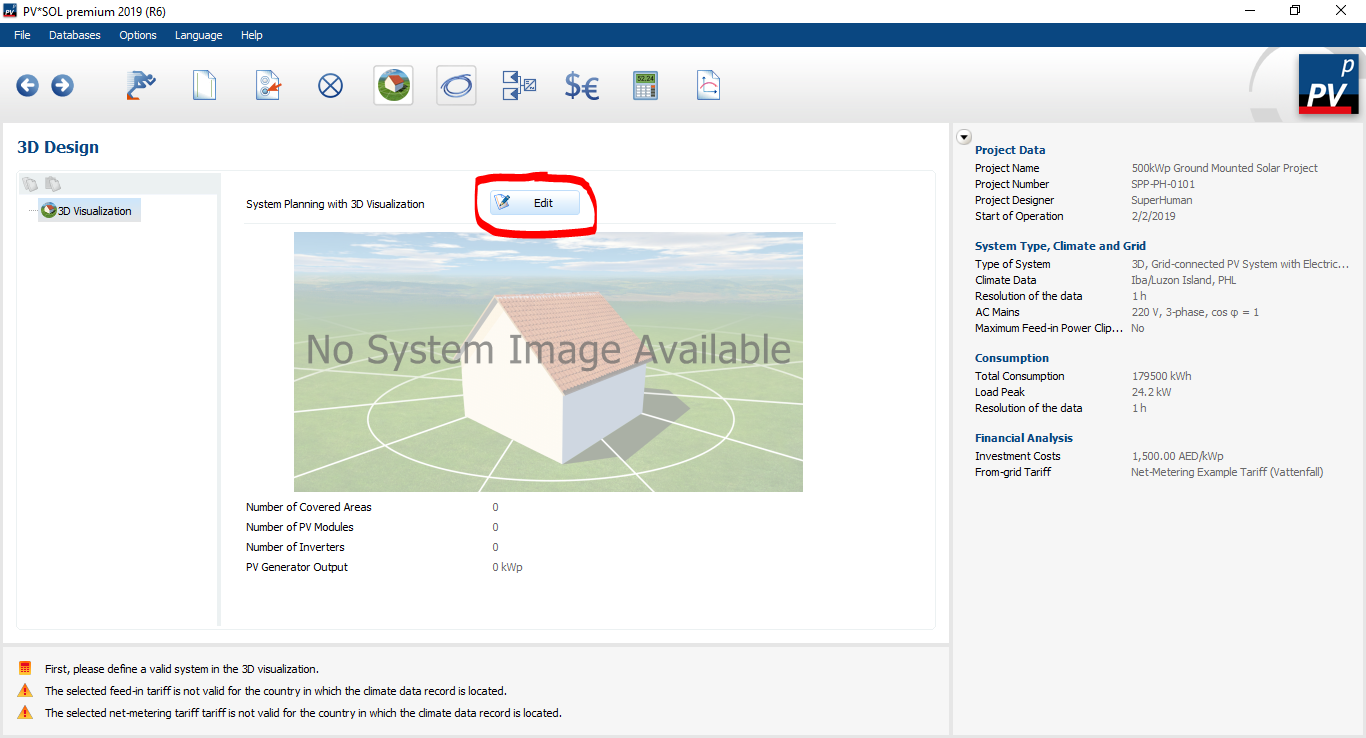
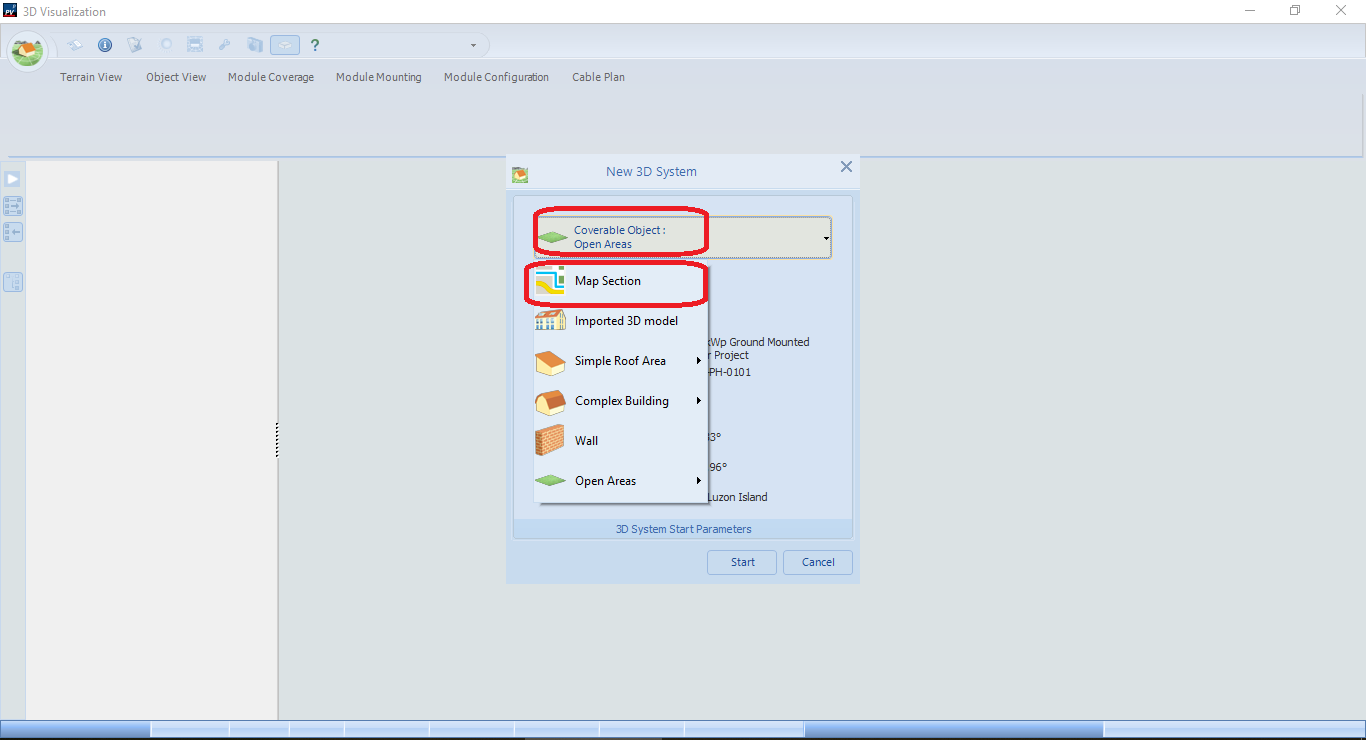
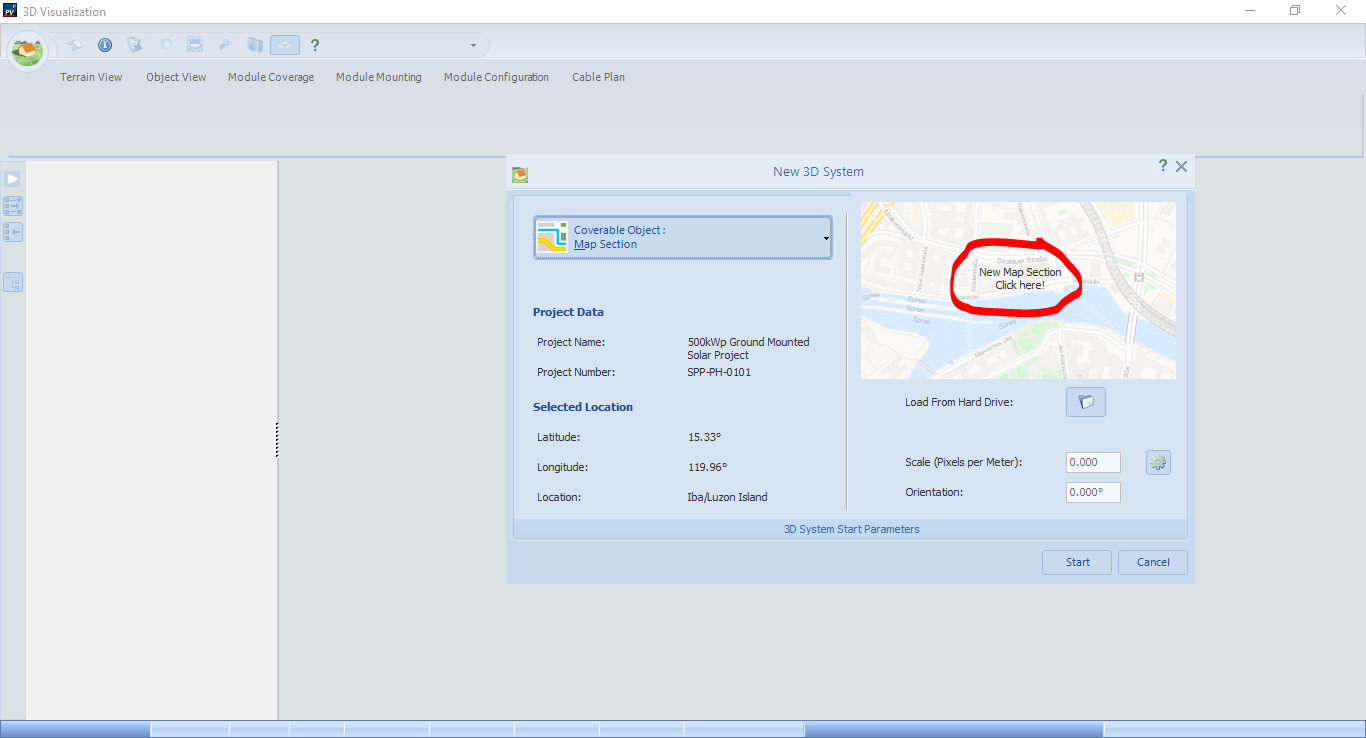
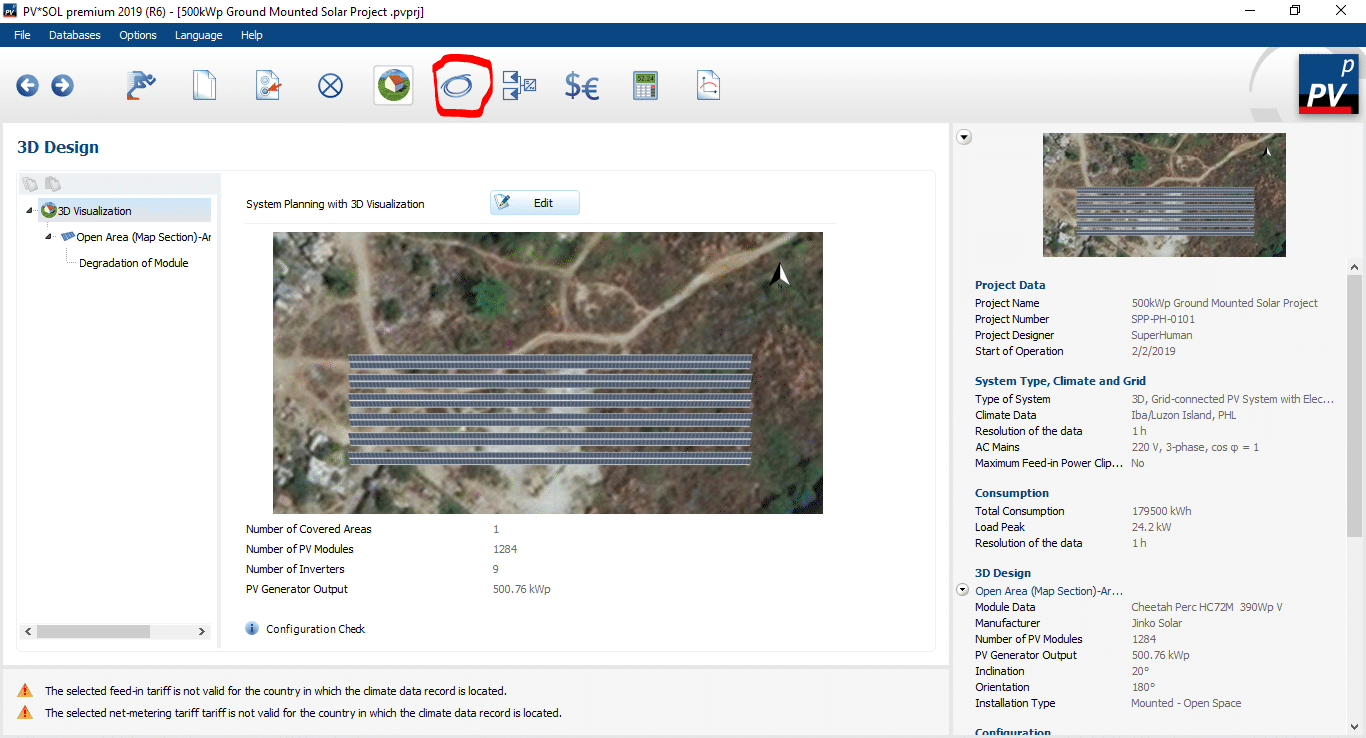
After clicking the 3D Design icon, you will be directed to the section for 3D design. Follow the steps above and click the New Map Section.
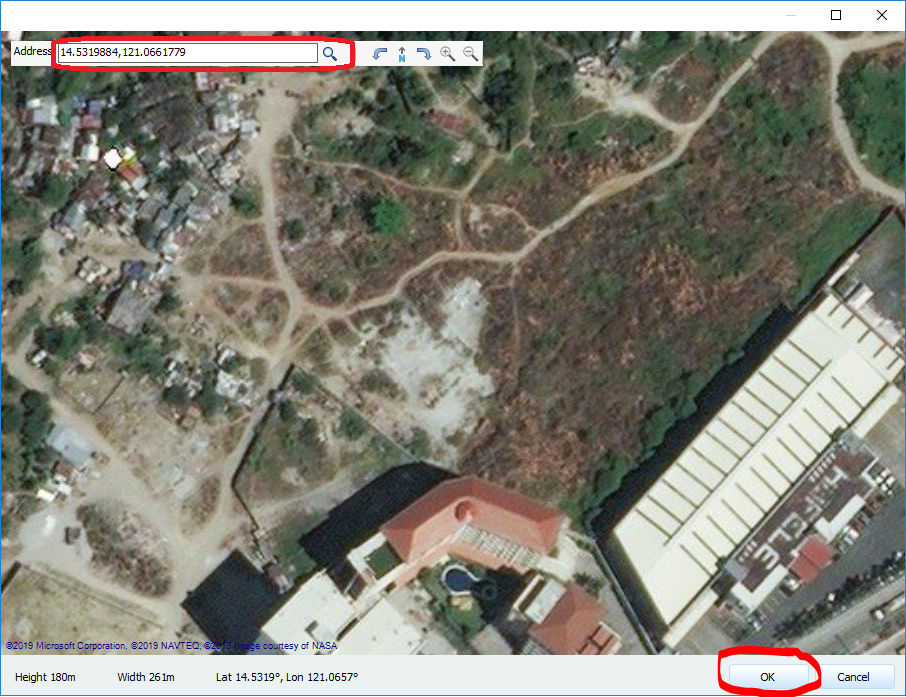
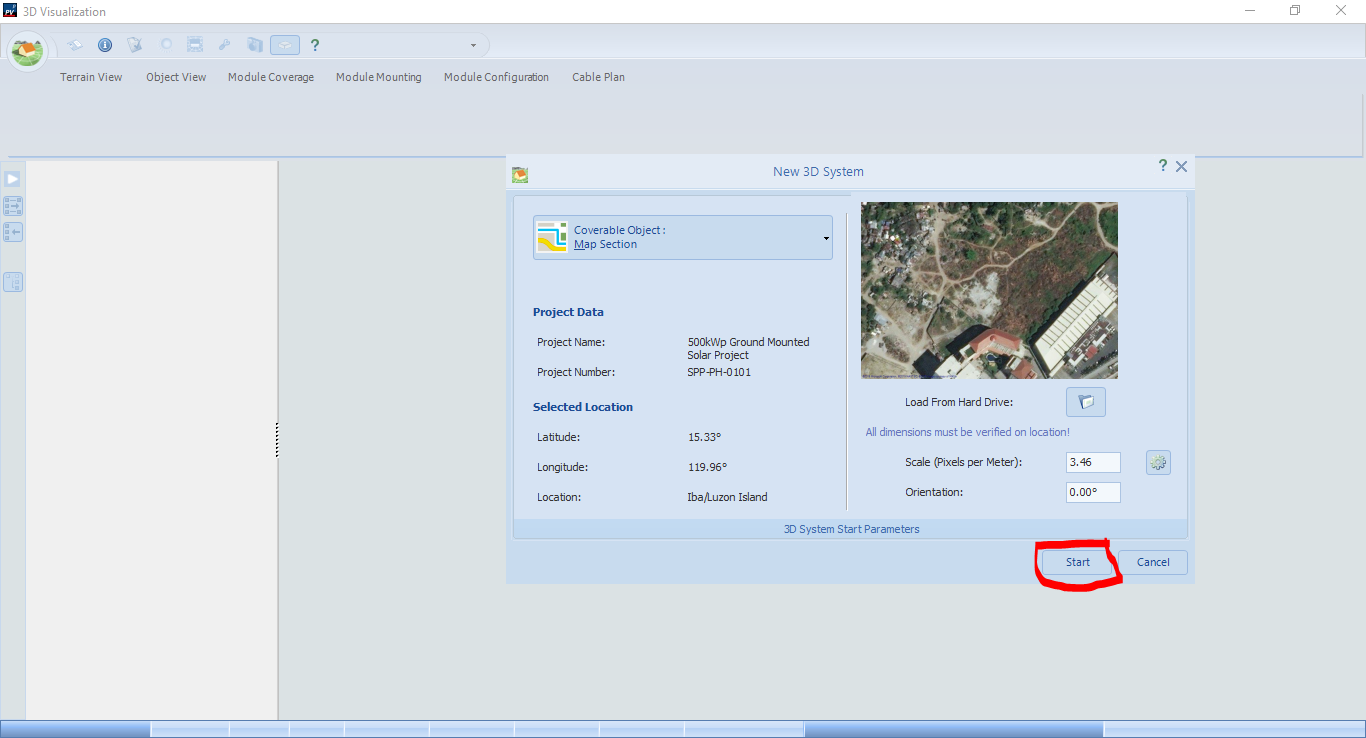
Copy our project coordinates (14.5319884,121.0661779), paste it in the search bar, then click the search button. It will direct you to the project location on the map. After that, hit OK to proceed. Assuming that the civil works on the site will be carried out in such a way, we can arrange the solar panels as per our specifications, we will just create the design as simple and as balanced as possible.
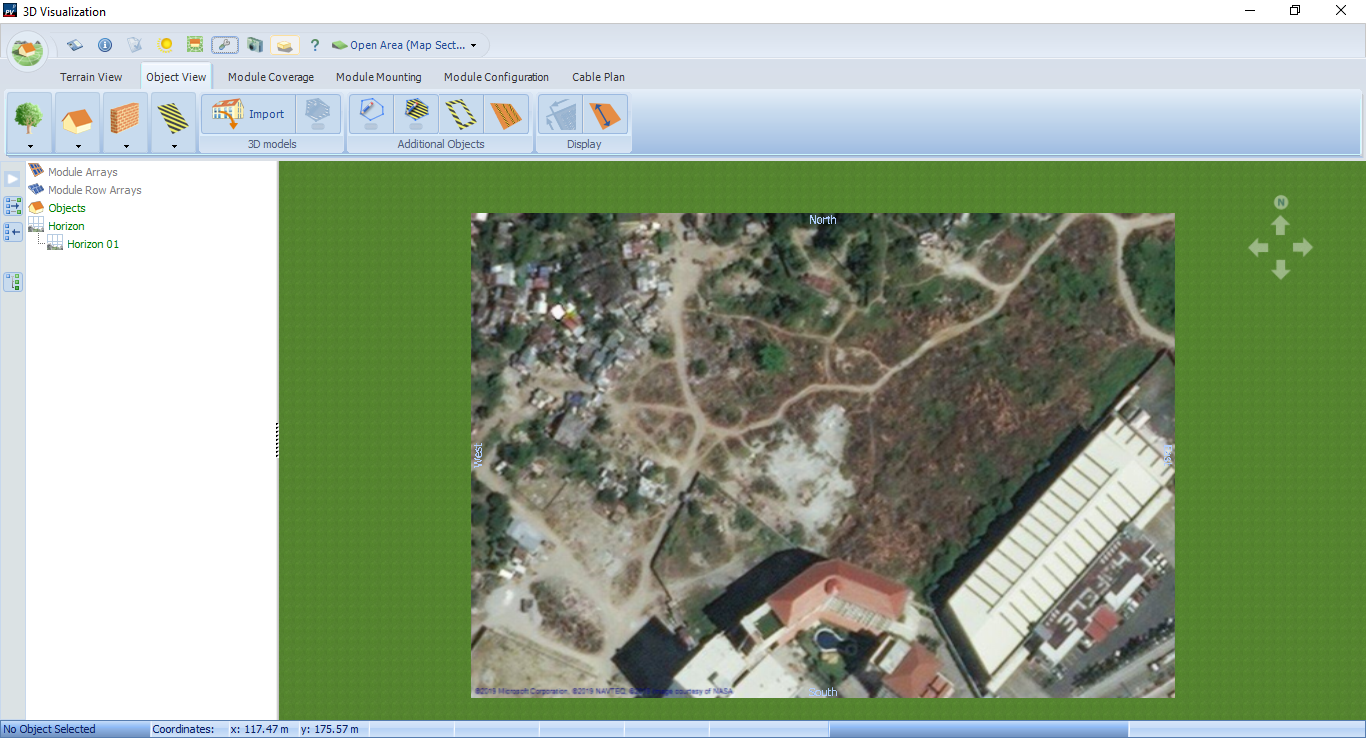
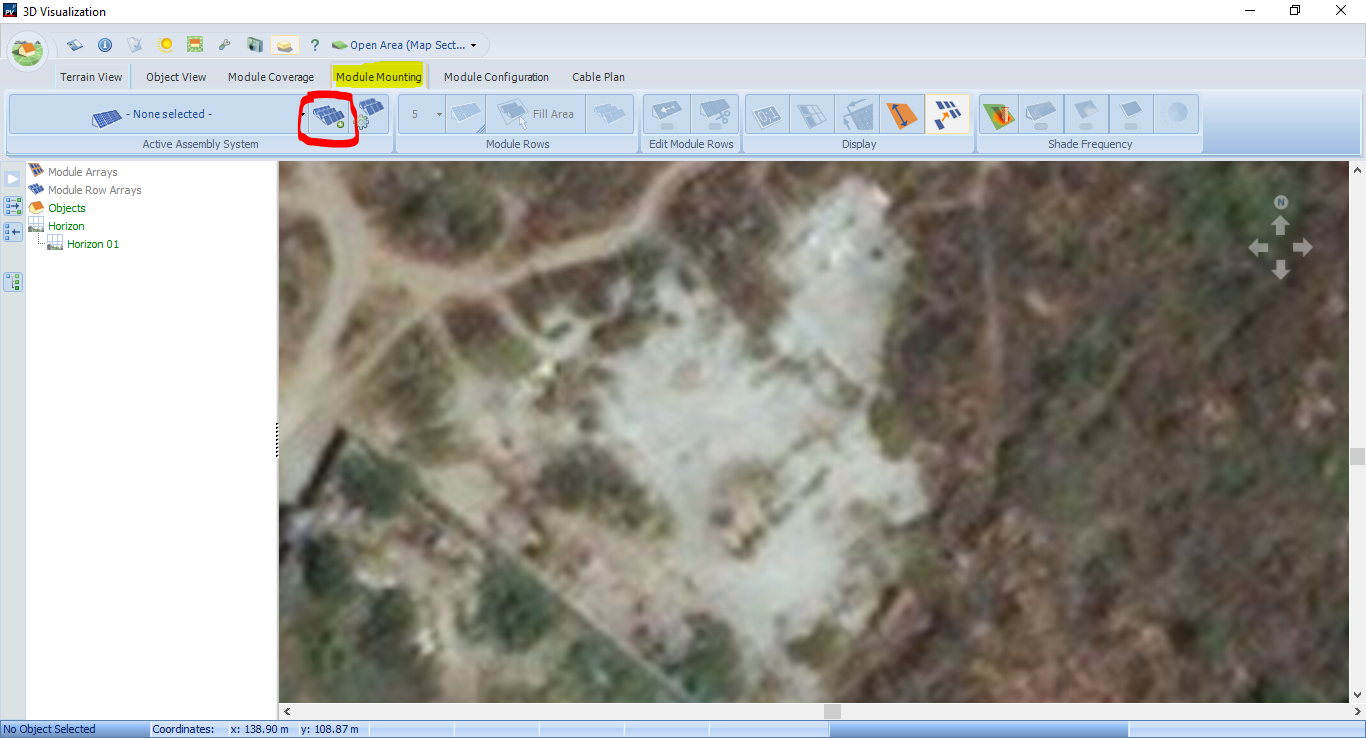
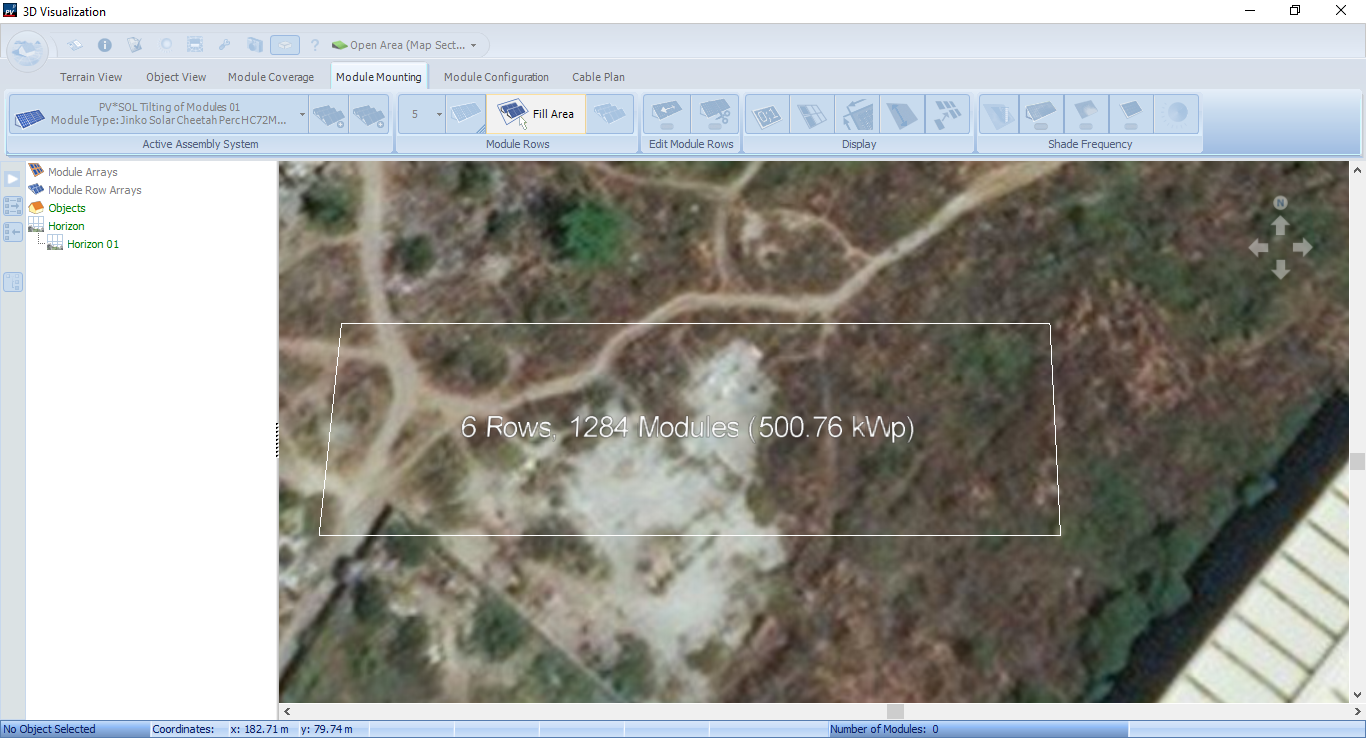
Follow the steps above so you can start with the mounting structure and solar modules arrangement.
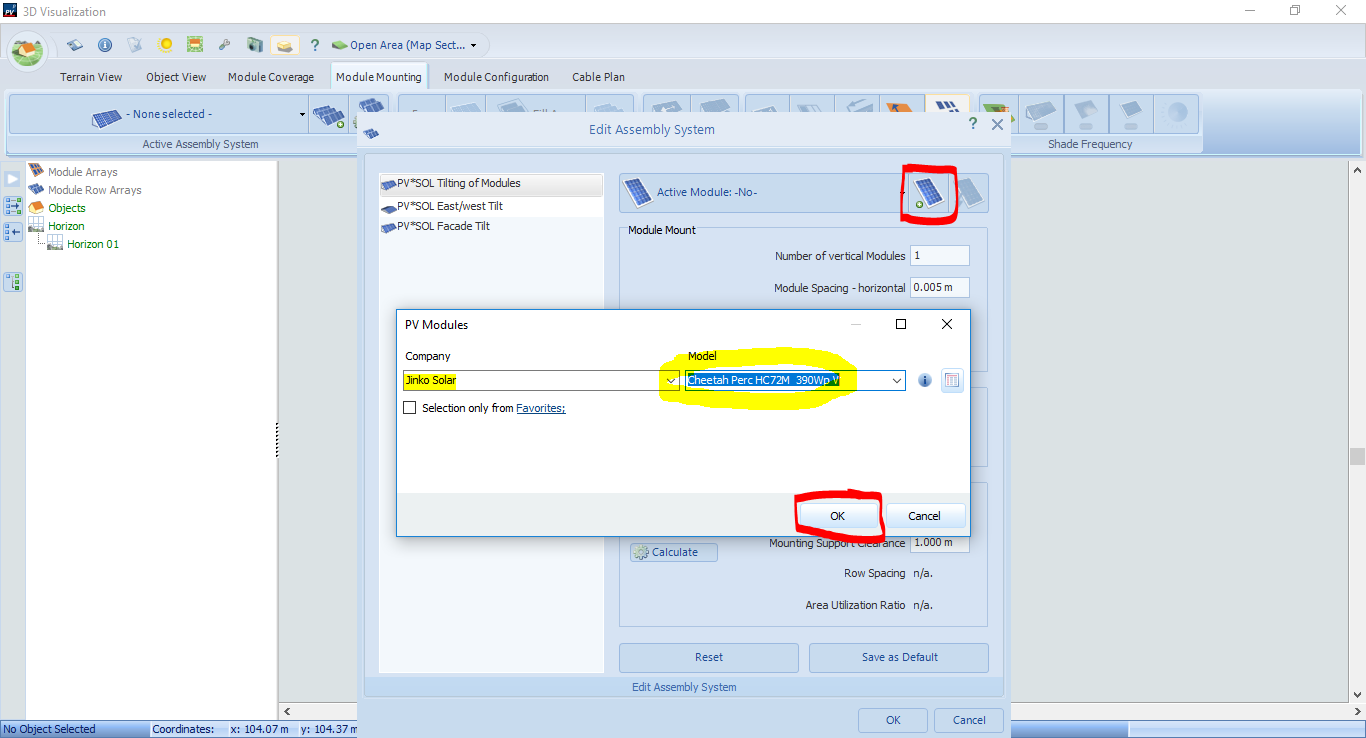
In this step, we will select the solar panels as per our specifications. First, click the solar panel icon with the plus sign, then select “Jinko Solar” on the company drop-down menu. Select the 390Wp model then hit OK to proceed.
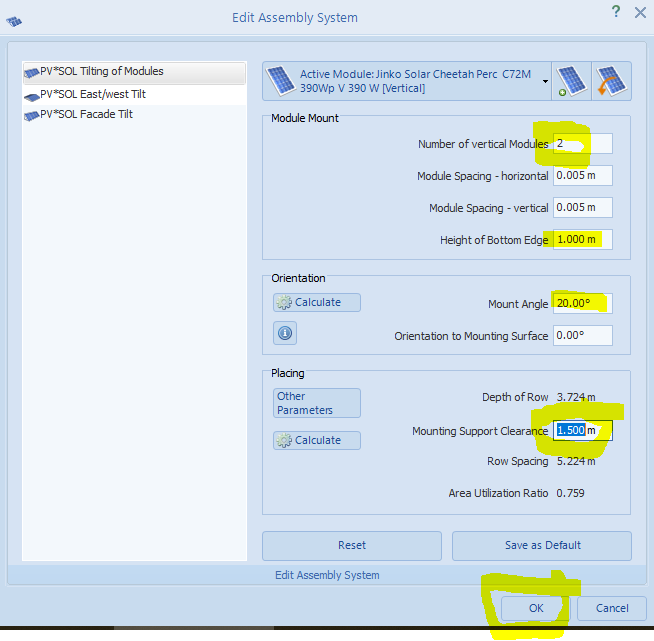
In this section, we will input 2 for the number of vertical modules, mounting angle will be 20 degrees and the support clearance to be 1.5m.
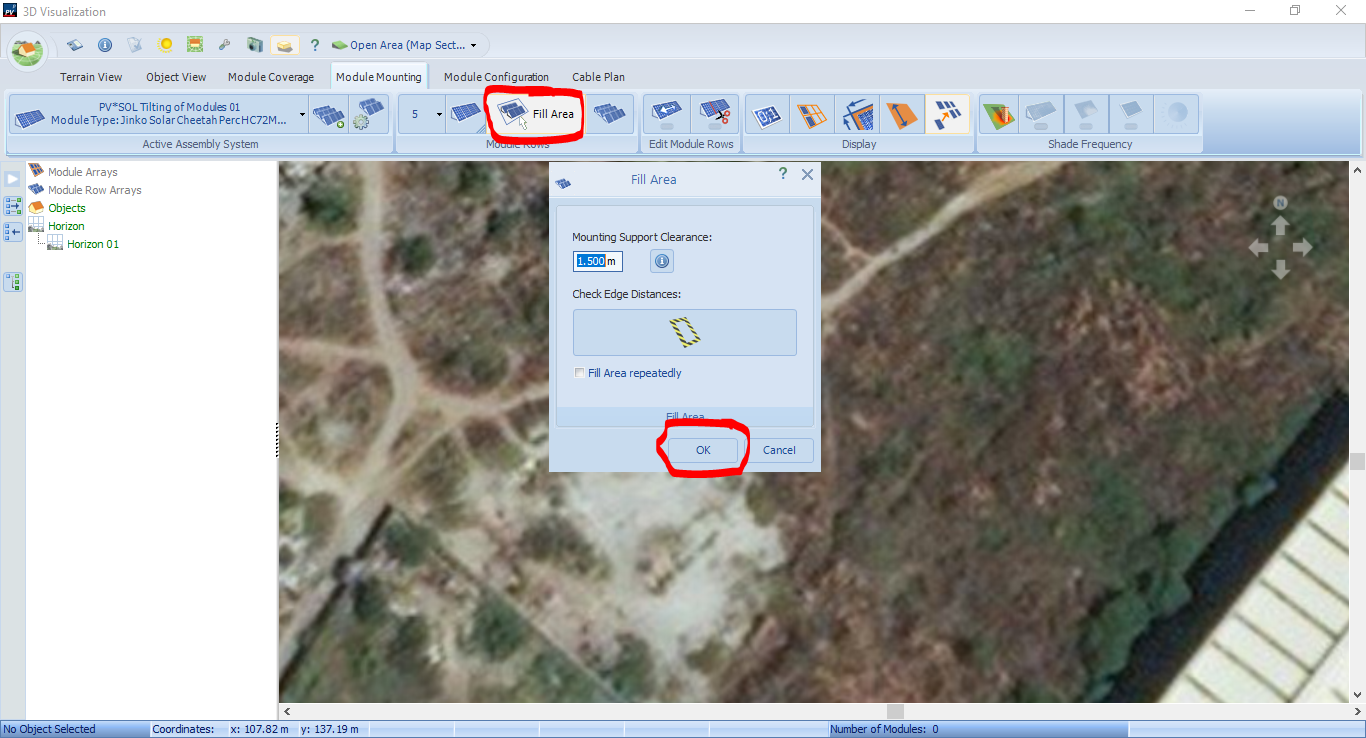
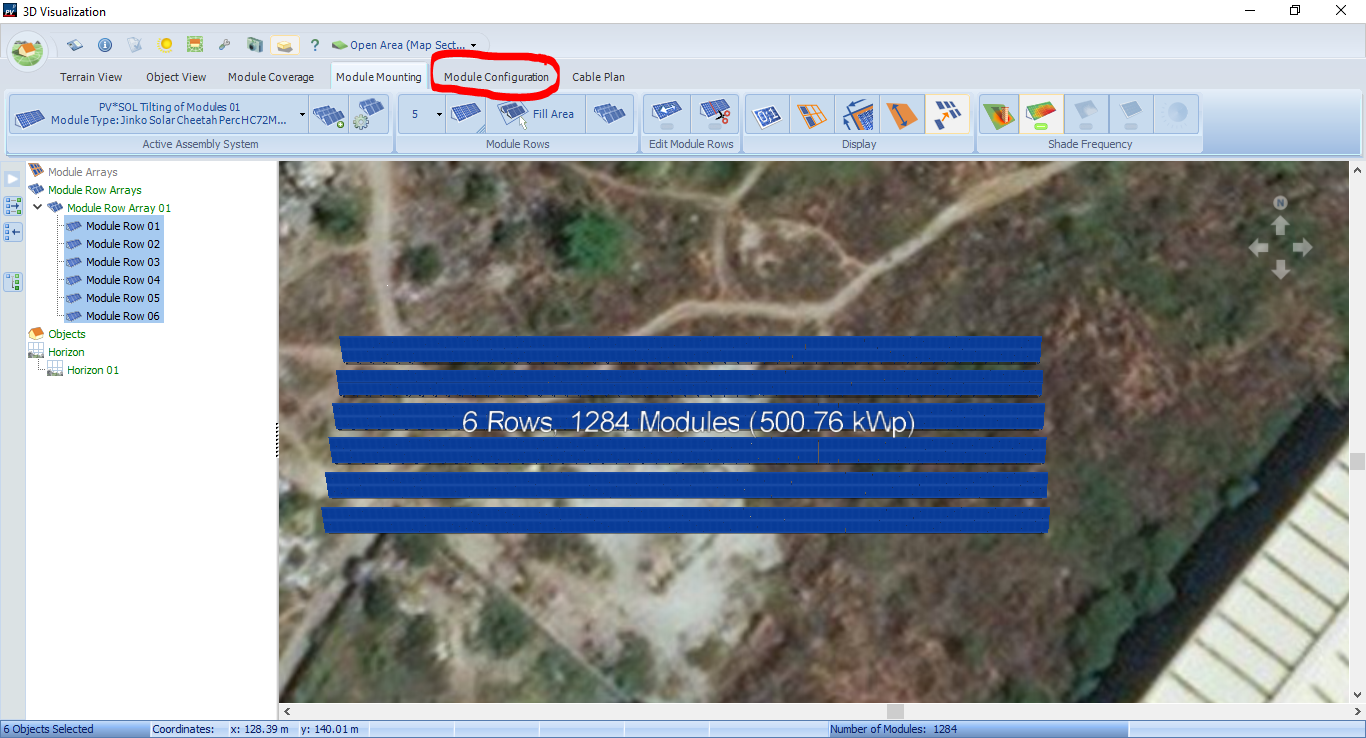
Select the “Fill Area” option in arranging the solar PV arrays. Click and drag on the ground and fill up the area with 1284 solar modules in 6 rows. You can also try to explore in here by trying other methods of arranging the solar PV arrays. After that, we can now proceed to the configuration and selection of the solar inverters for the project.
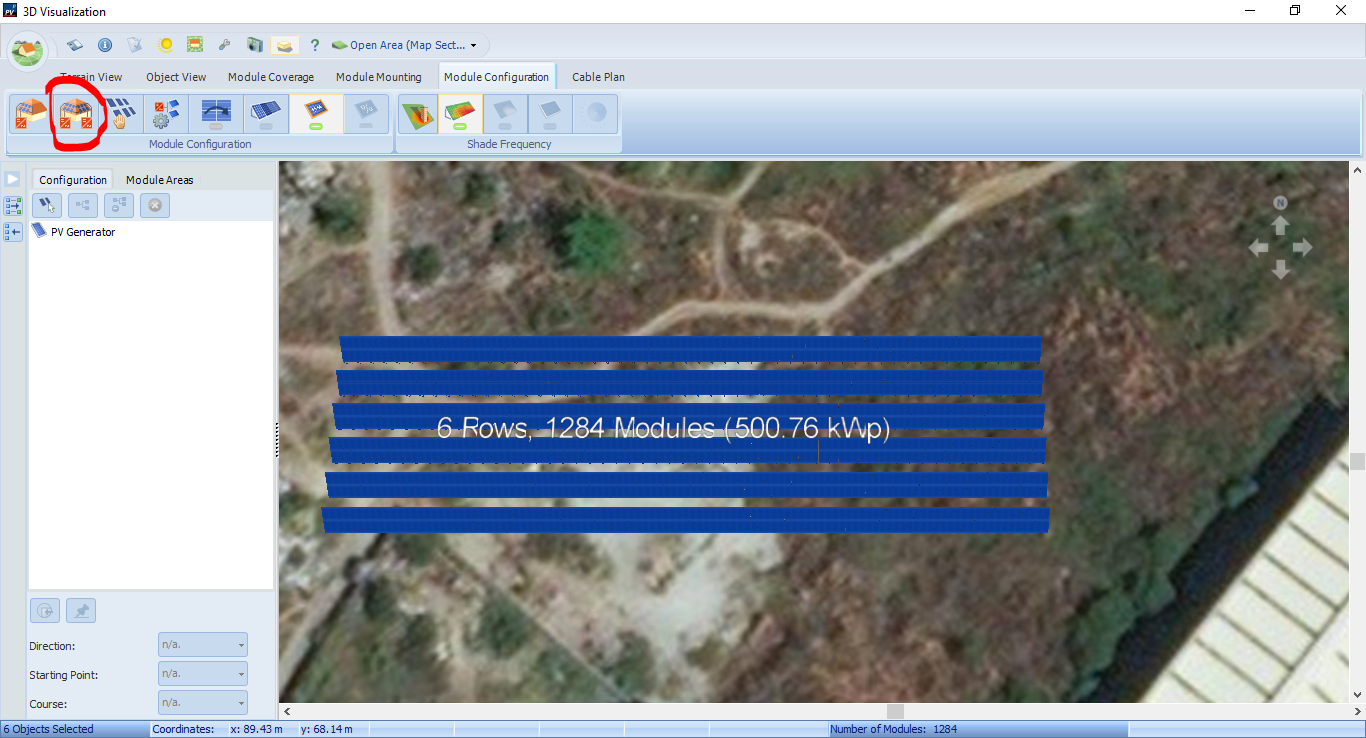
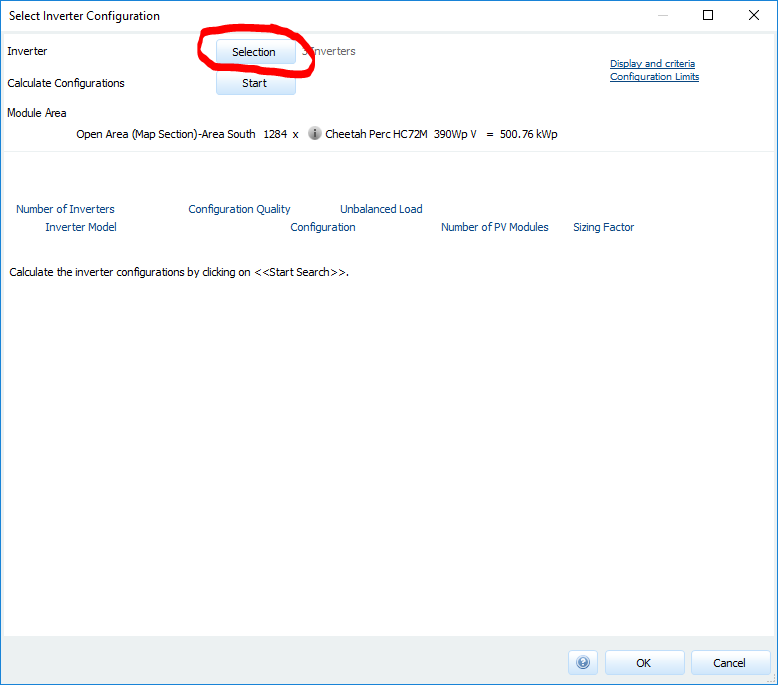
Select the inverter selection tool.Click the icon for inverter configuration.Start the inverter selection.
Follow the steps above to proceed with the solar inverter selection.
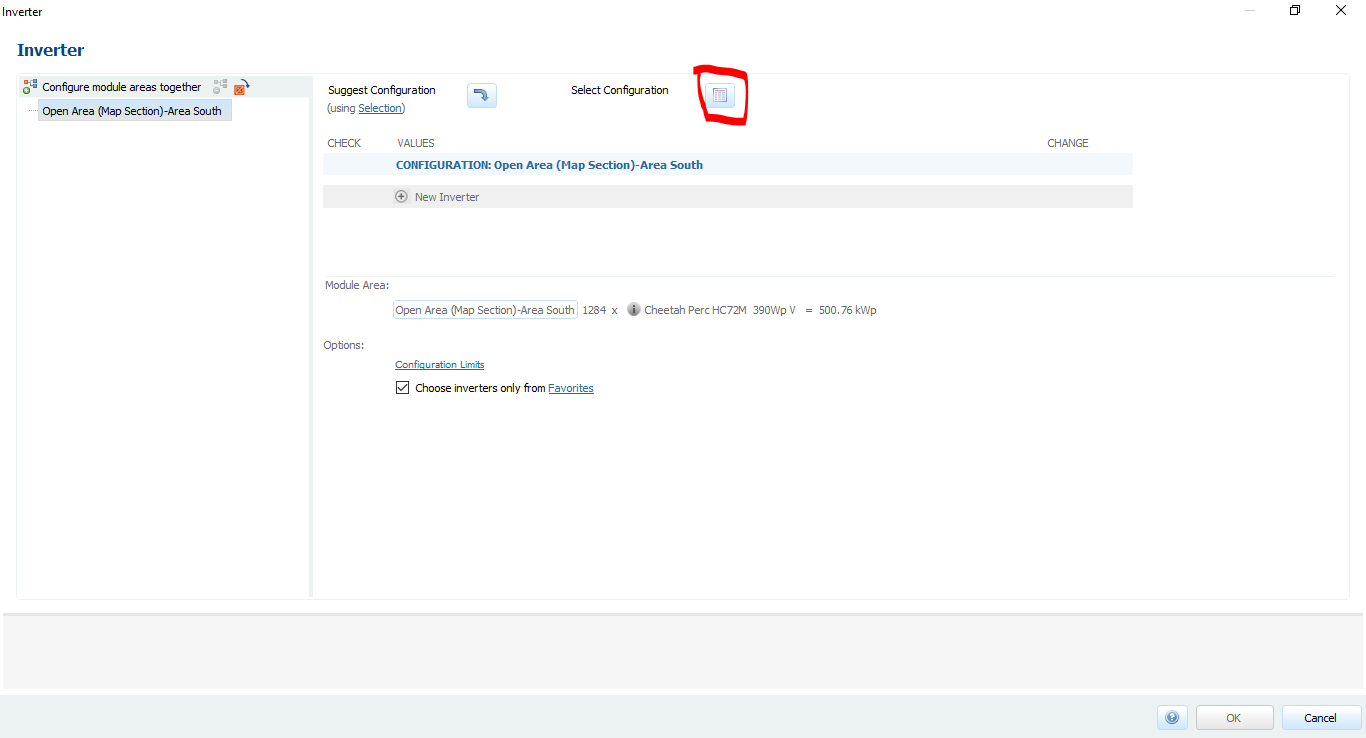
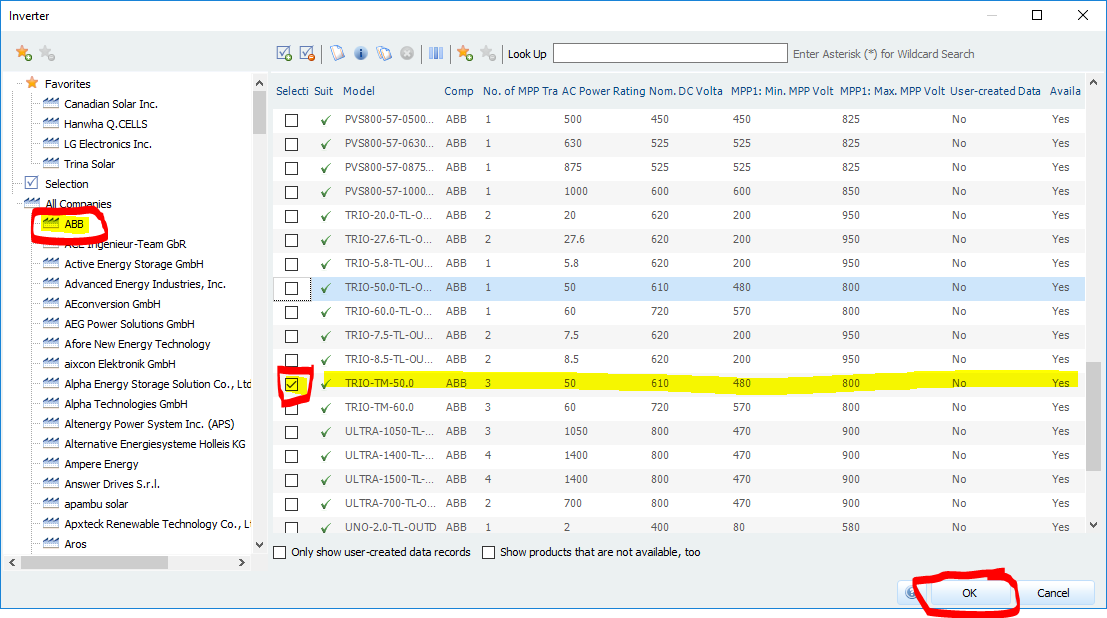
Now, select ABB and choose the TRIO-TM-50.0 model as per our solar project specifications. Hit OK the proceed.
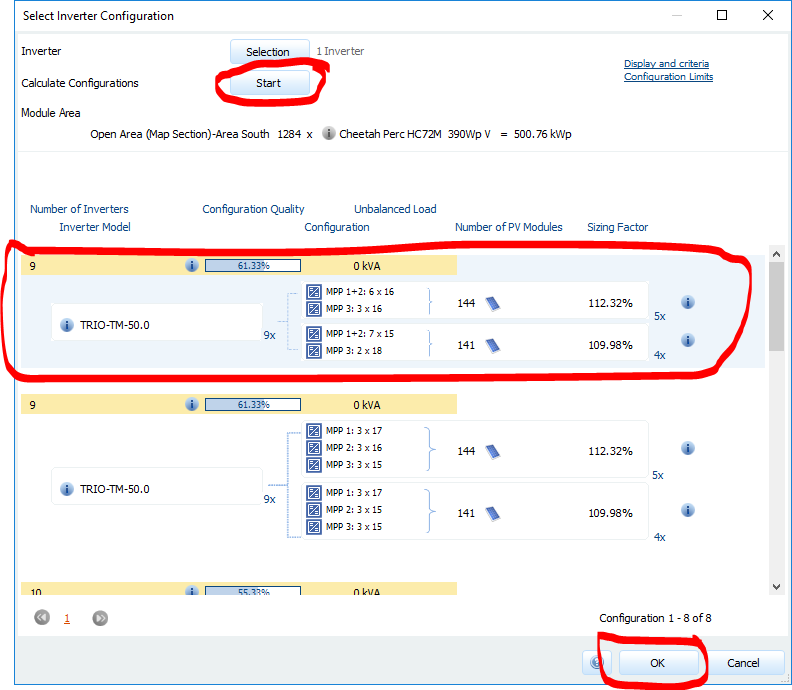
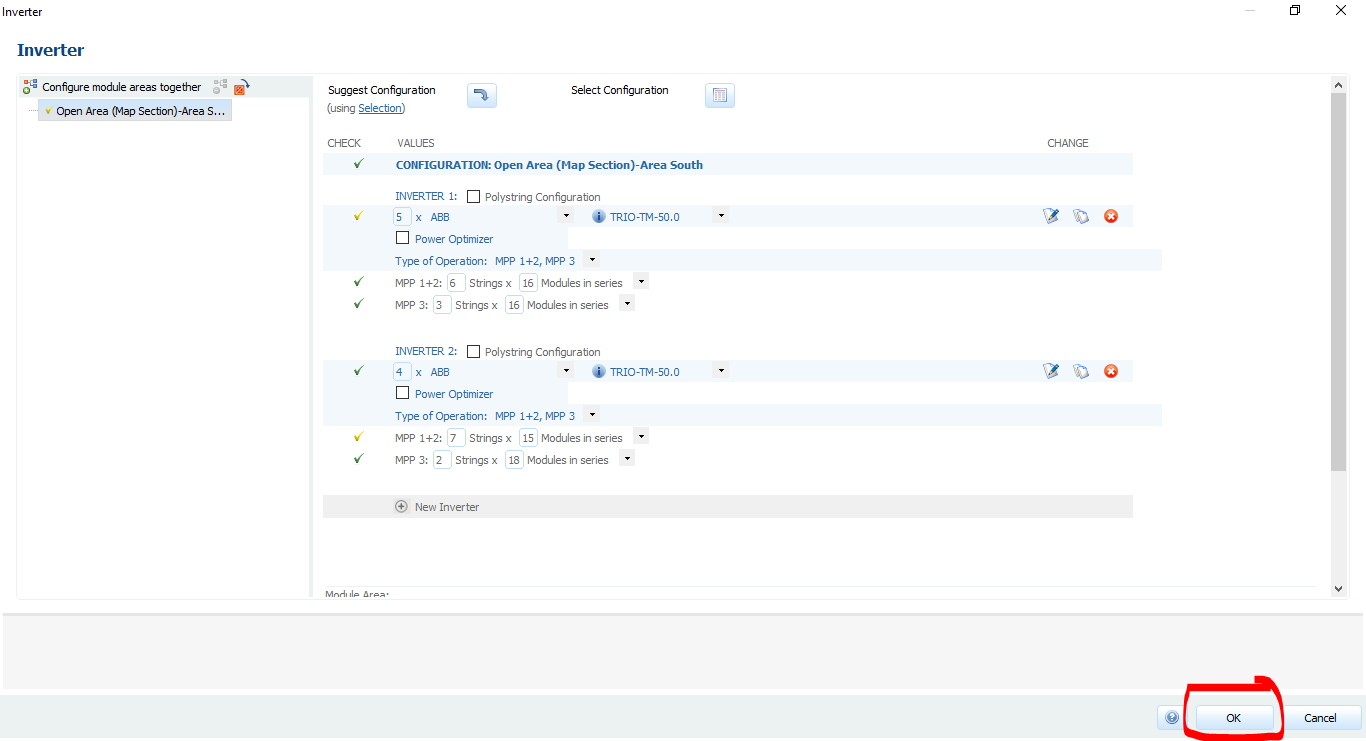
After clicking start, the software will then choose the number of inverters needed, as well as the solar PV string configuration automatically.
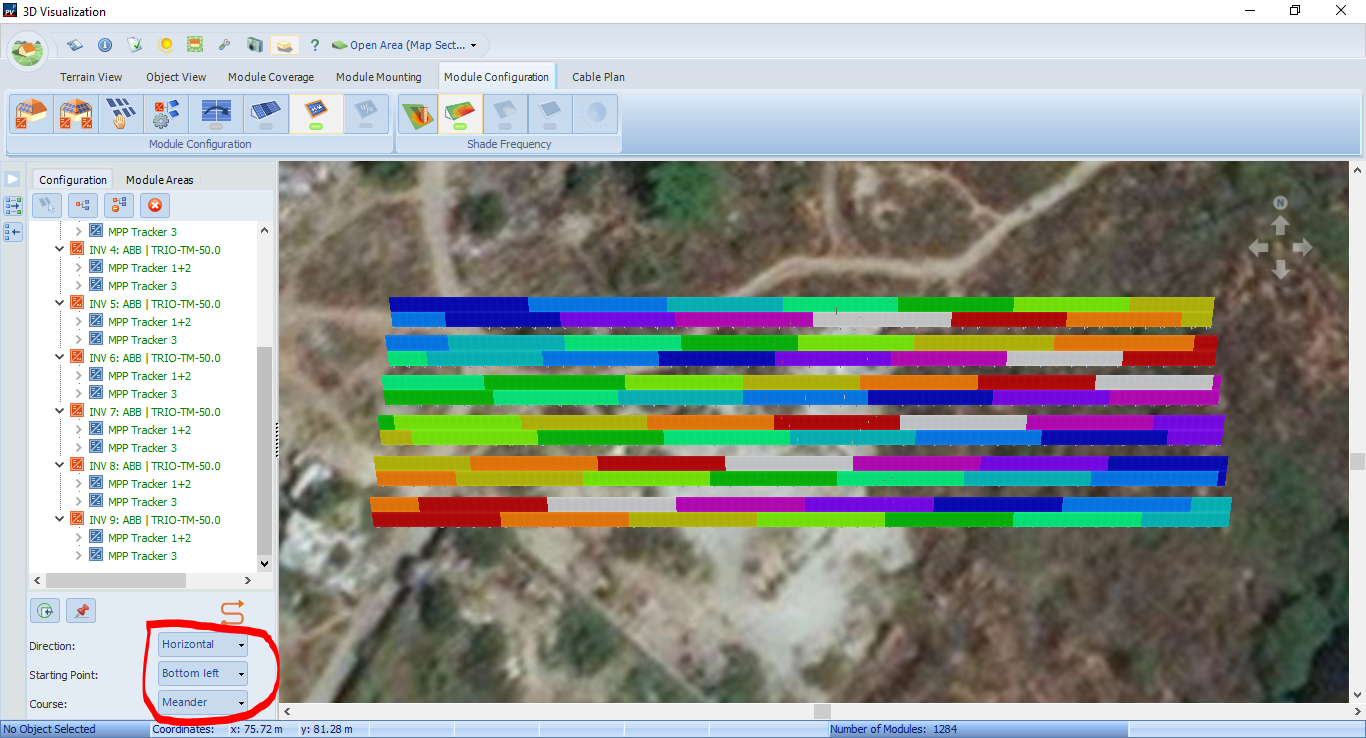
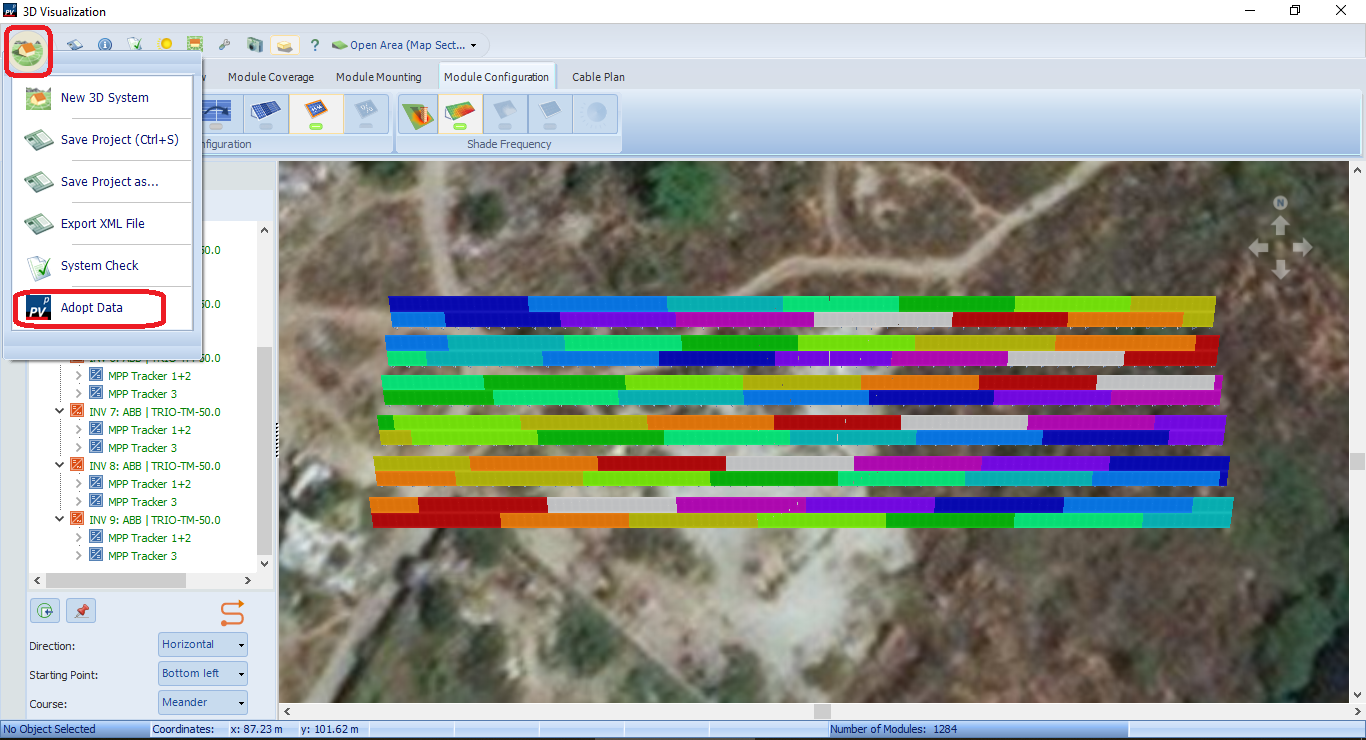
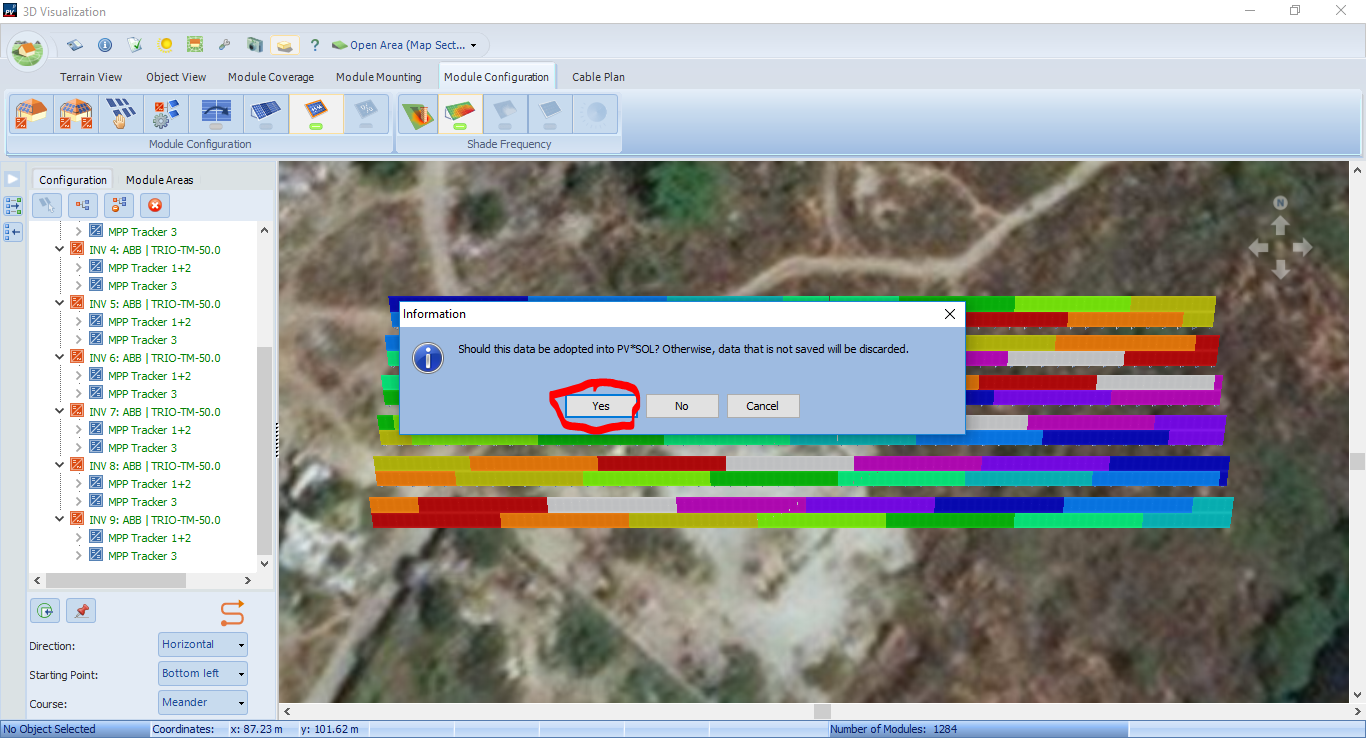
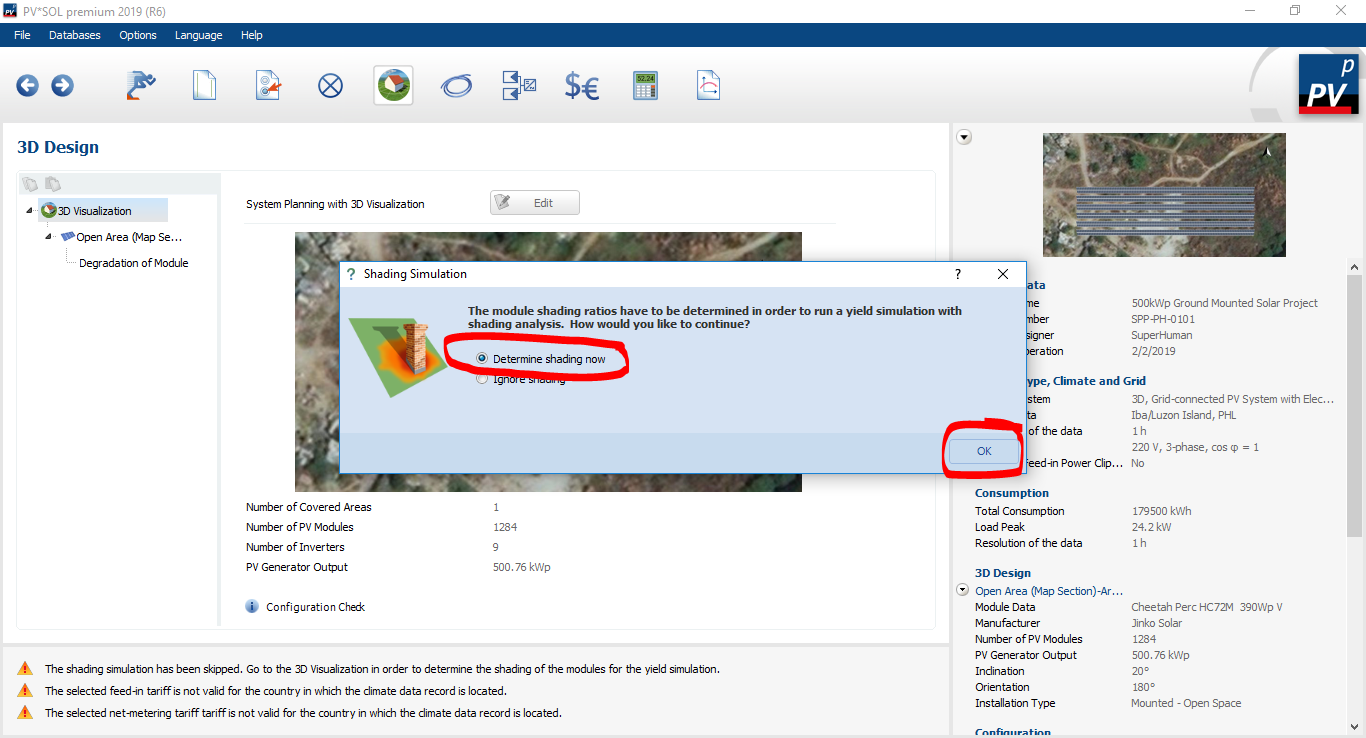
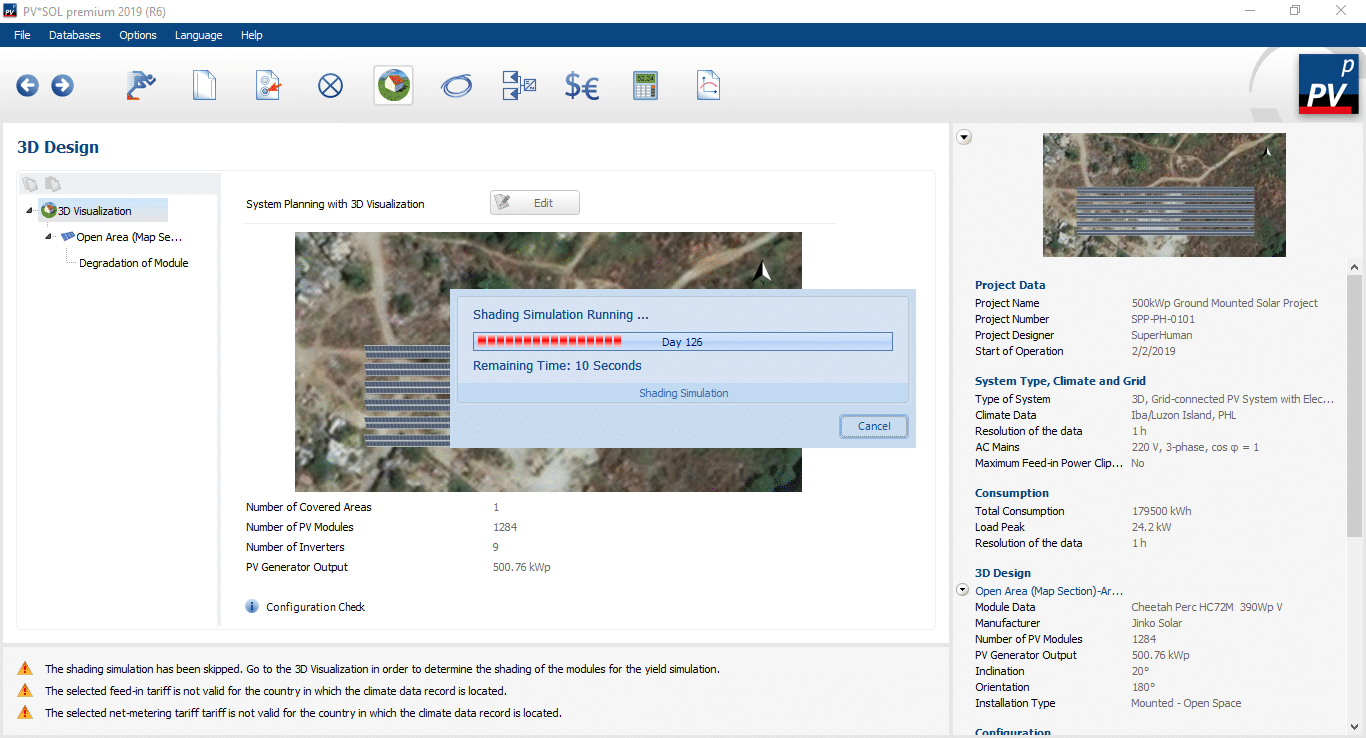
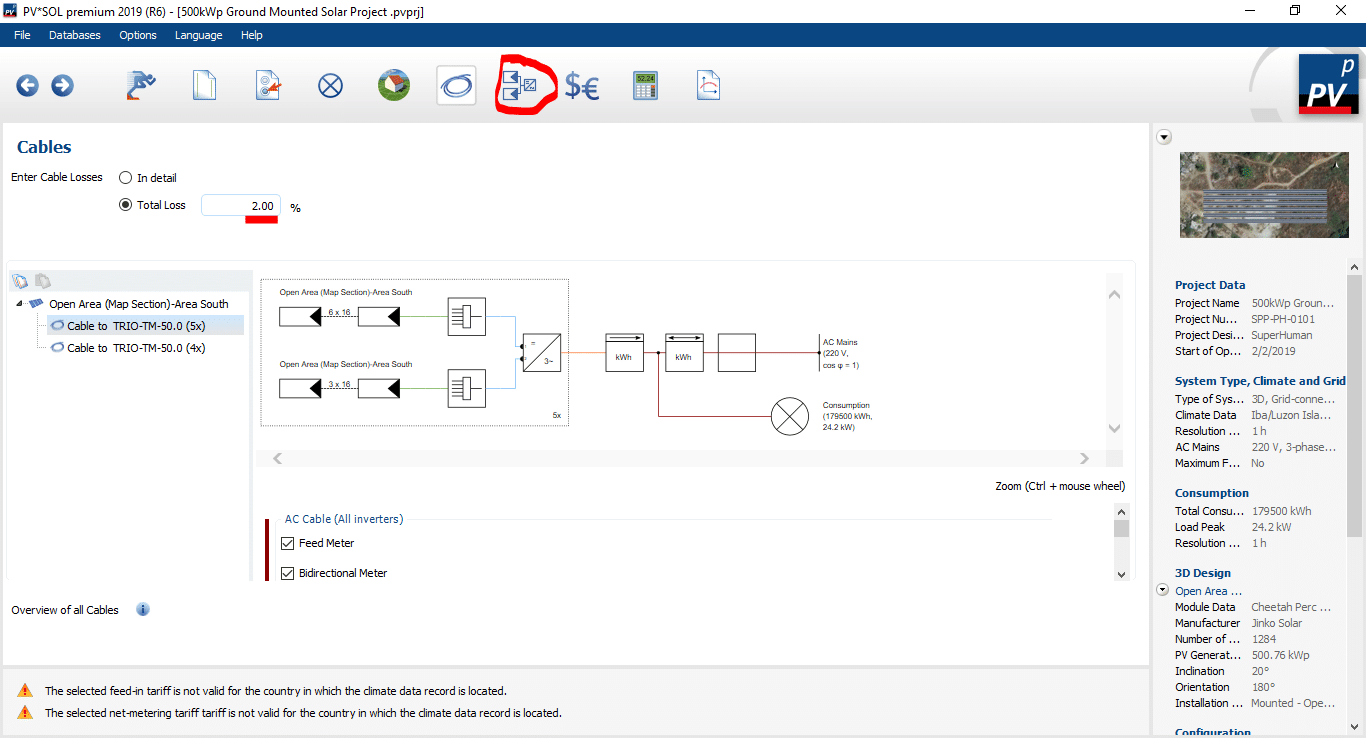
The string configuration is shown here.Each string is represented by a different color, arranging them horizontally, from bottom left and in meander course, will result to this.Now, arrangement of solar modules is done and it’s time to go back to the main section.Click ‘Yes’ to save it.Choose this option to determine the shadowing.This process might take some time since it includes the shadowing effect on the simulation.Now, click on the next icon to proceed.At this time, we will just skip the detailing of the cables and just enter 2% for the cable losses. This may differ depending on the actual length and sizes of the cables that are to be used.
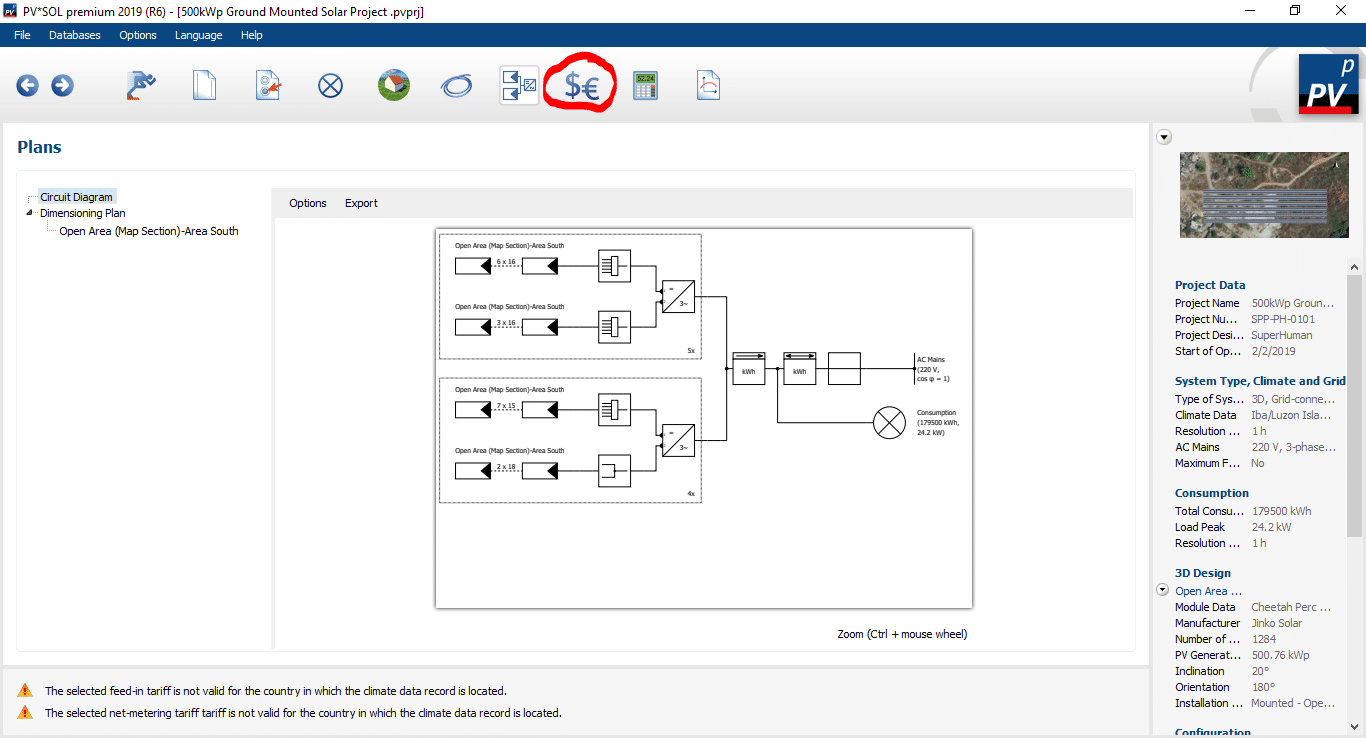
Financial Analysis
Now, it’s time to go to the Financial Analysis section.
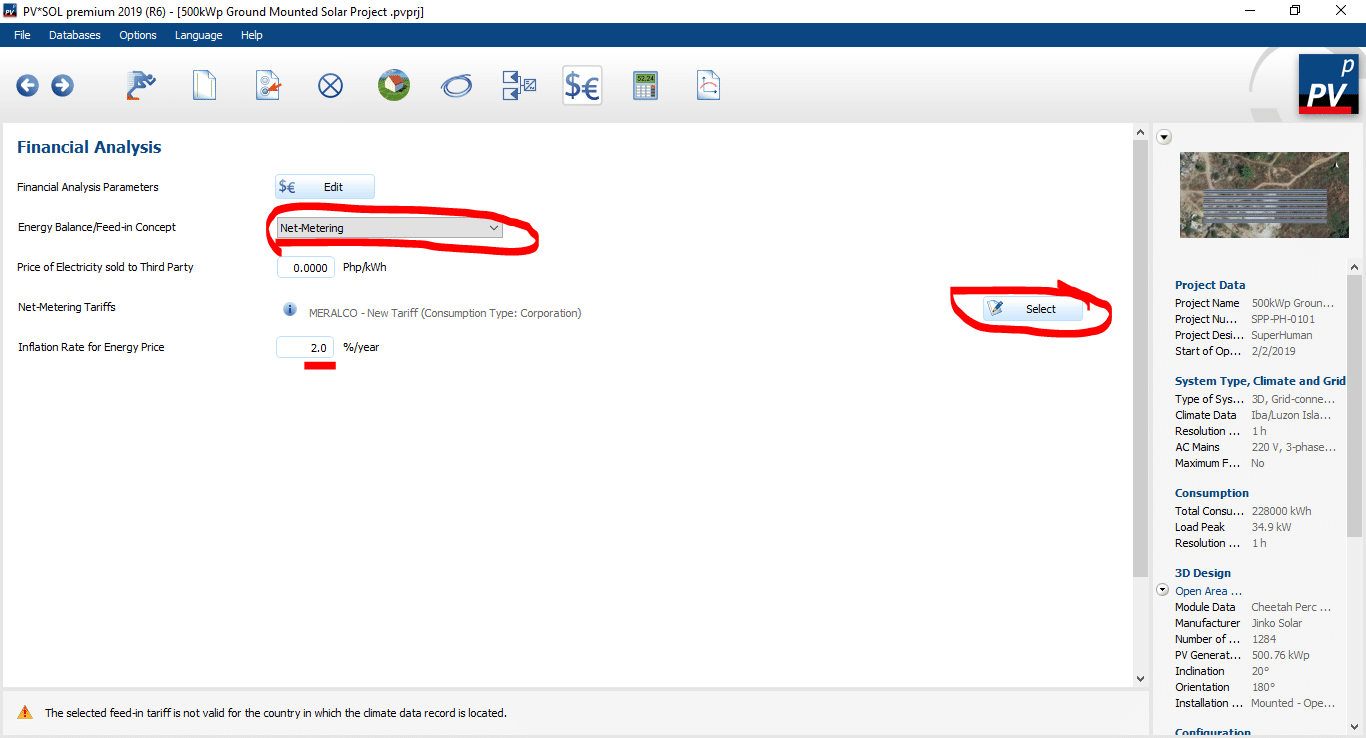
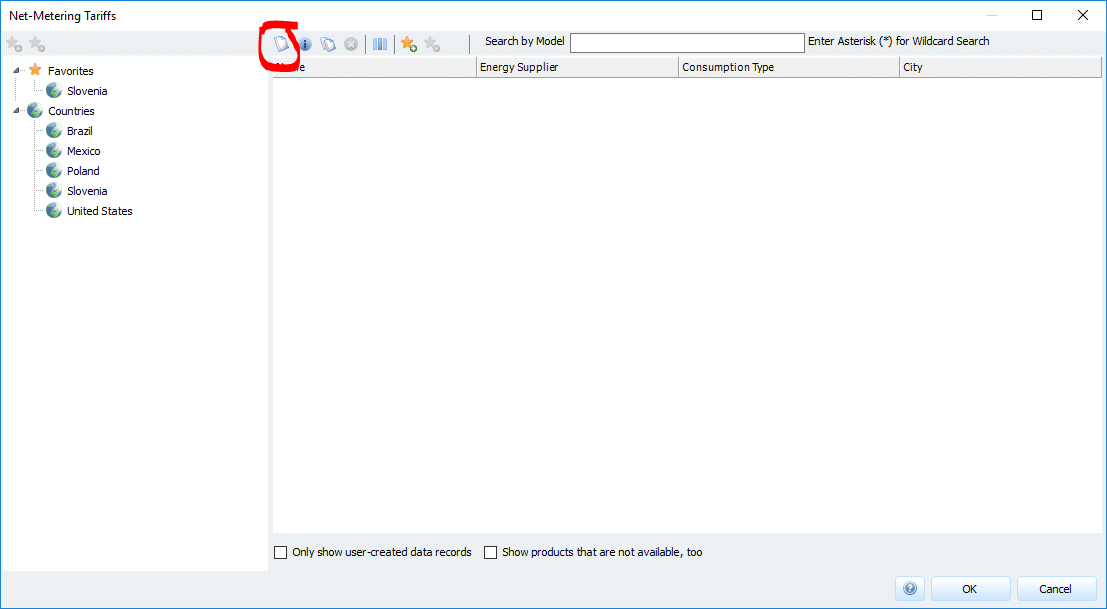
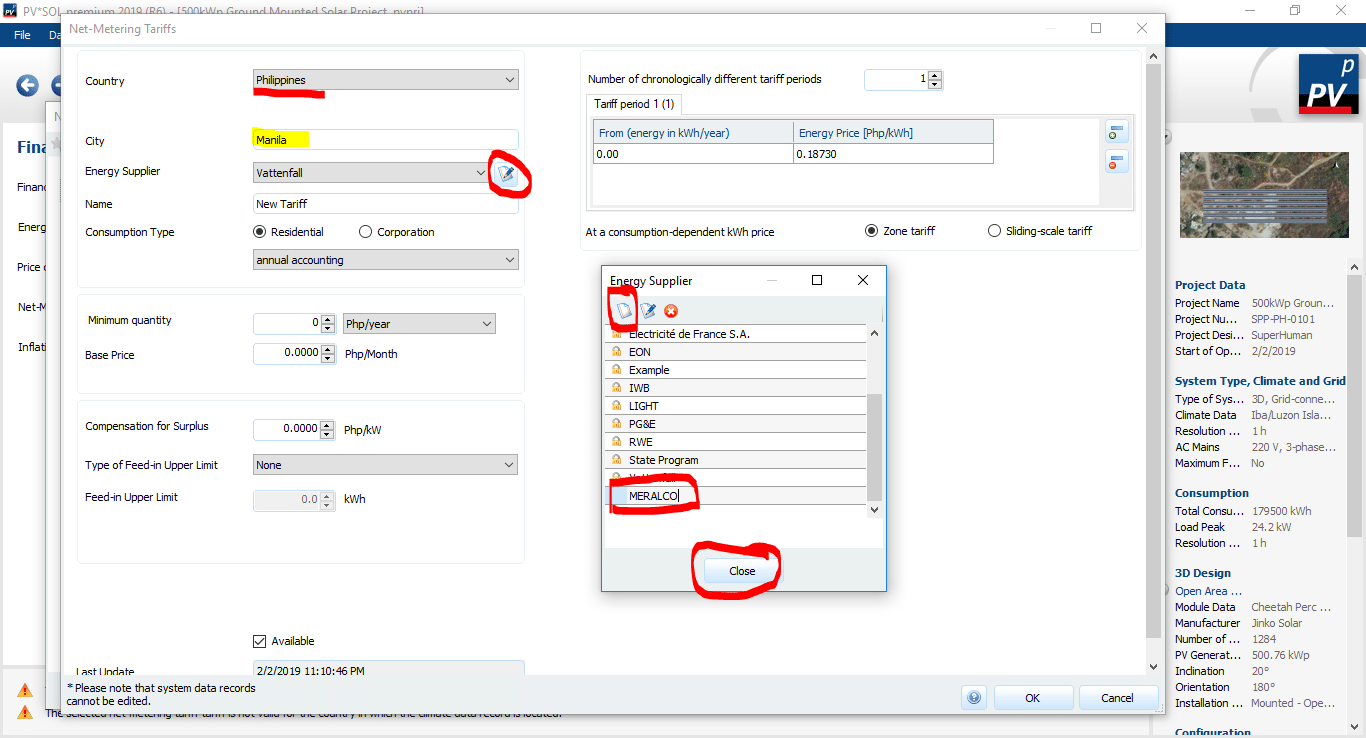
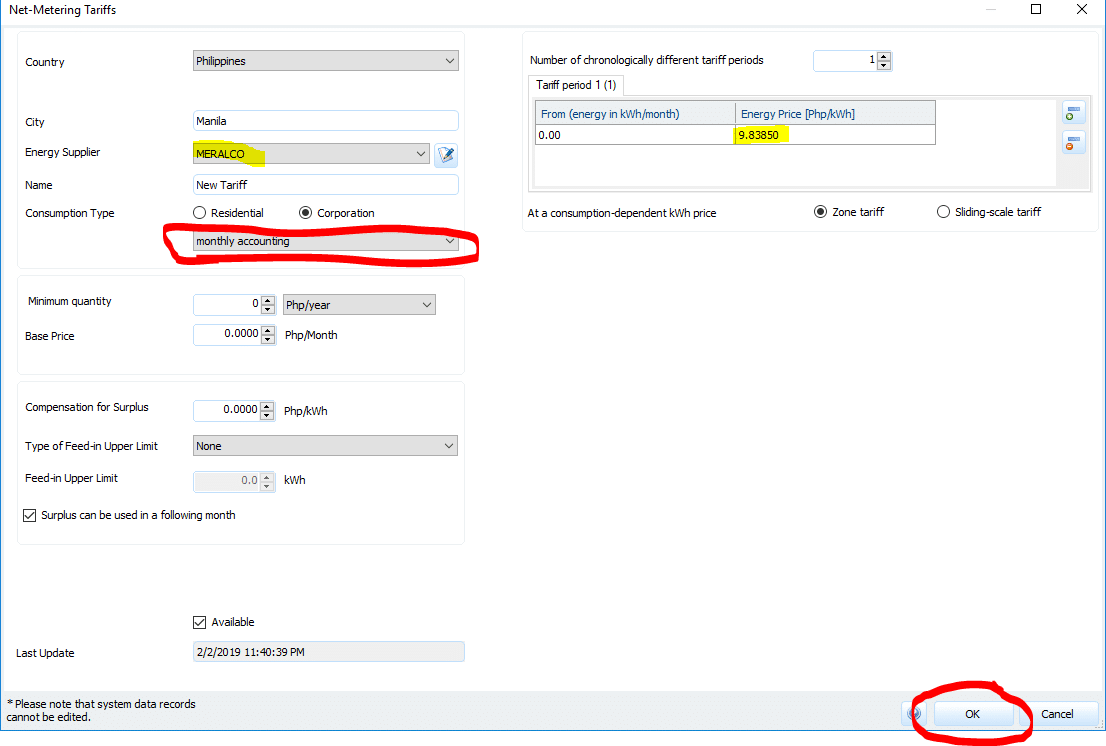
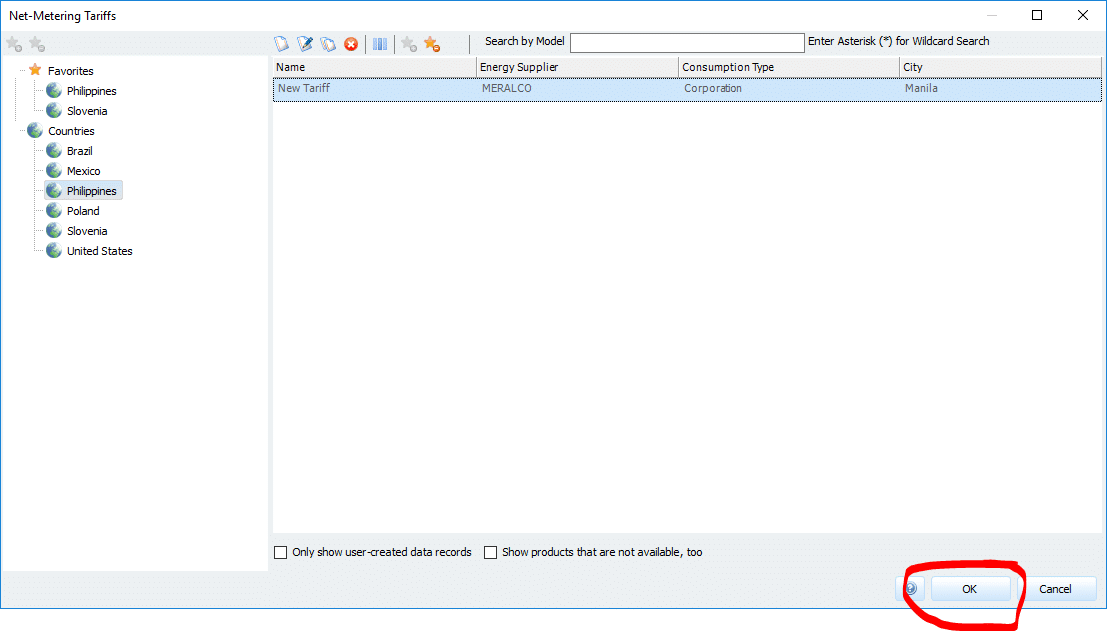
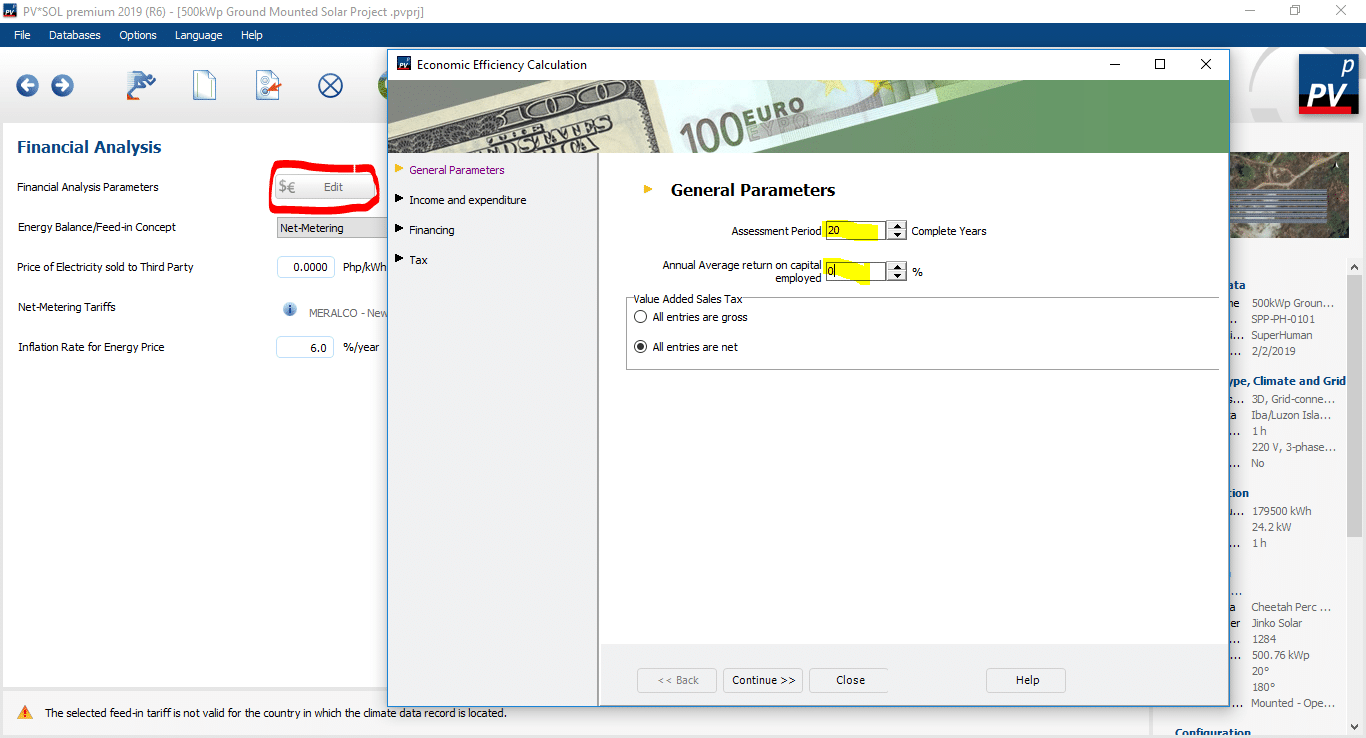
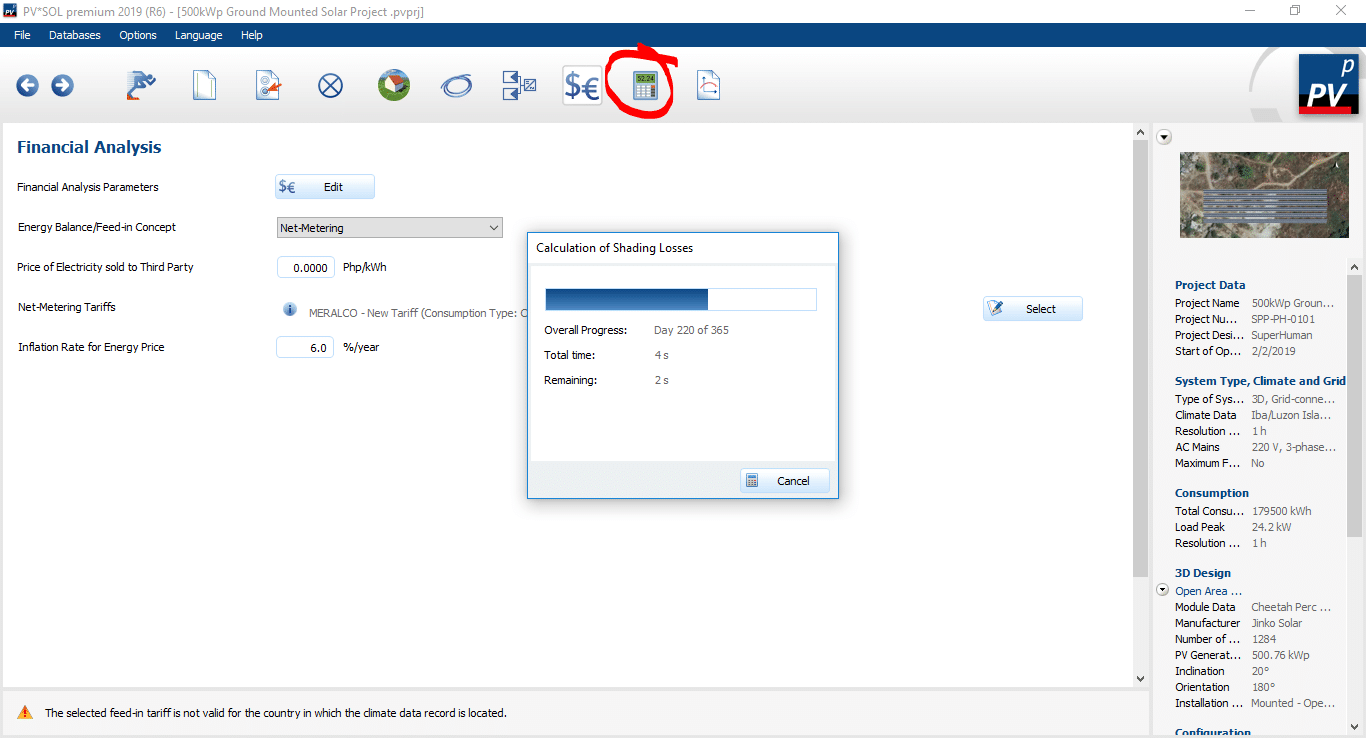
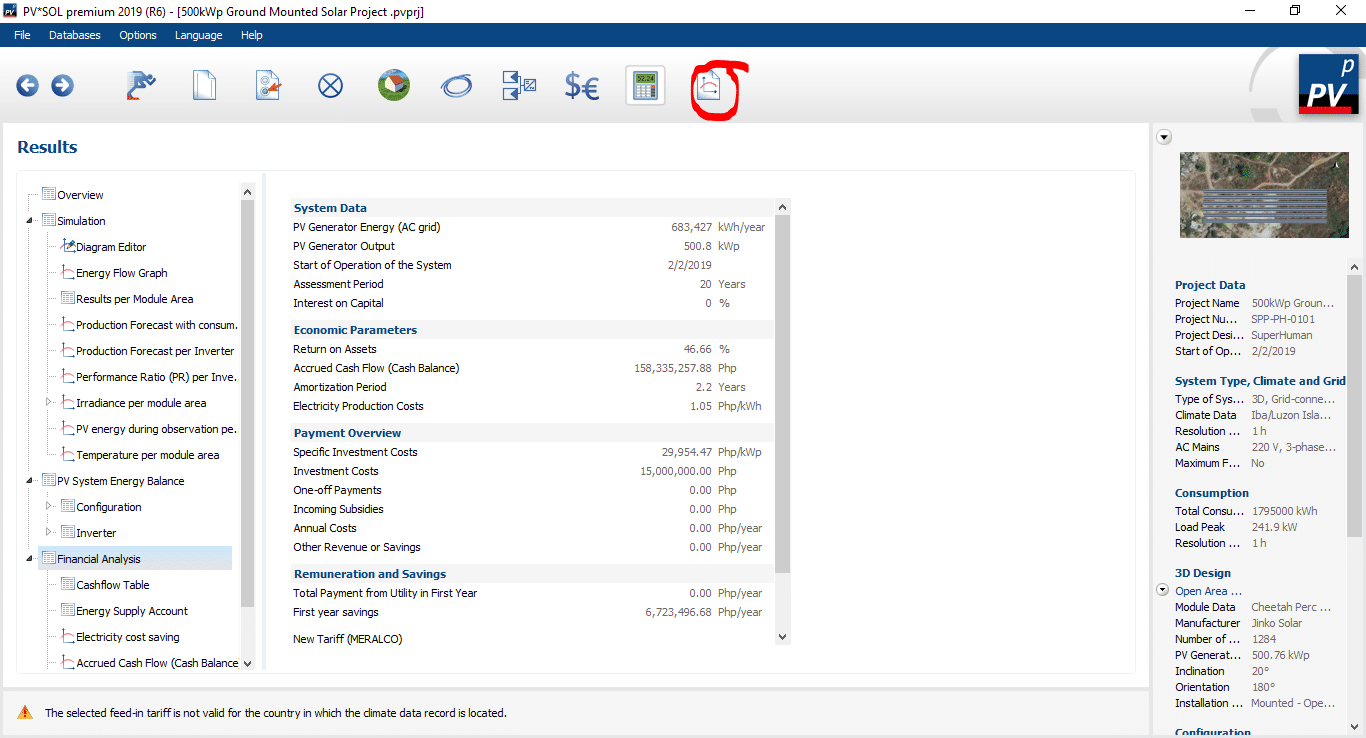
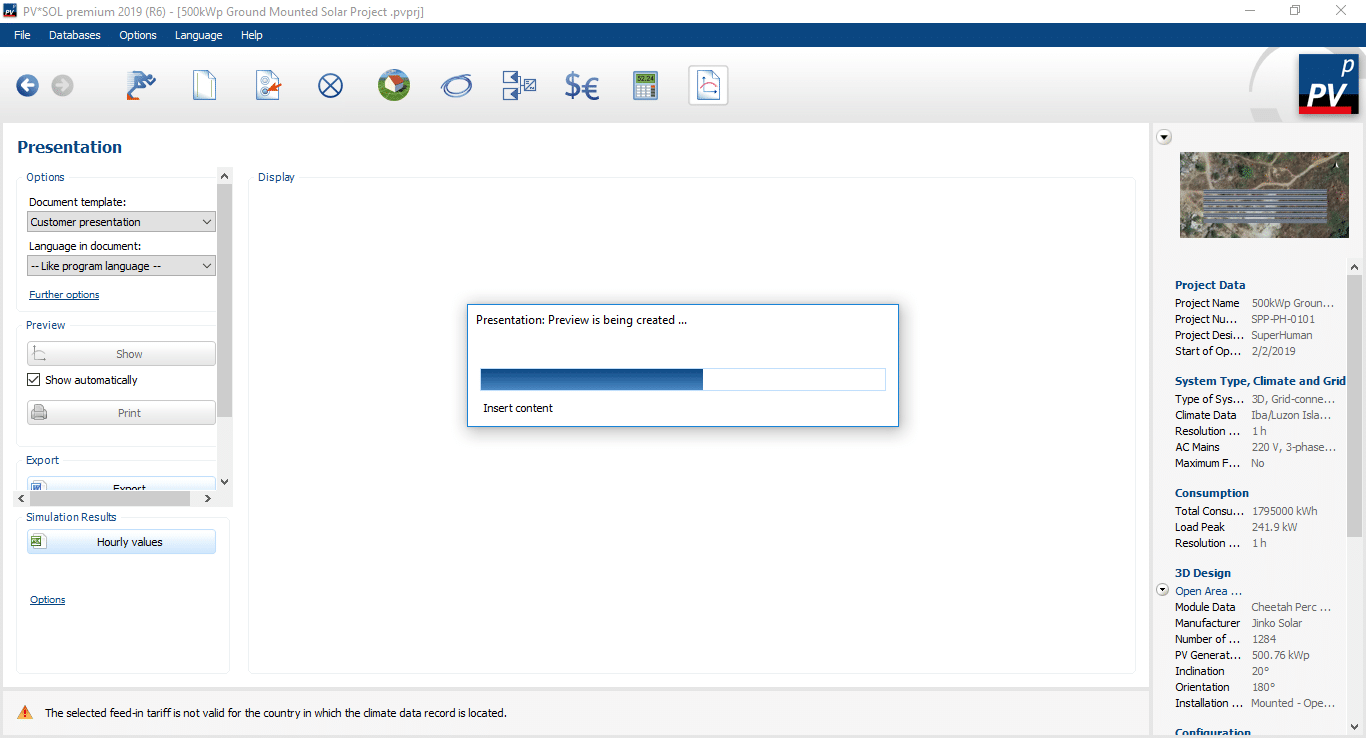
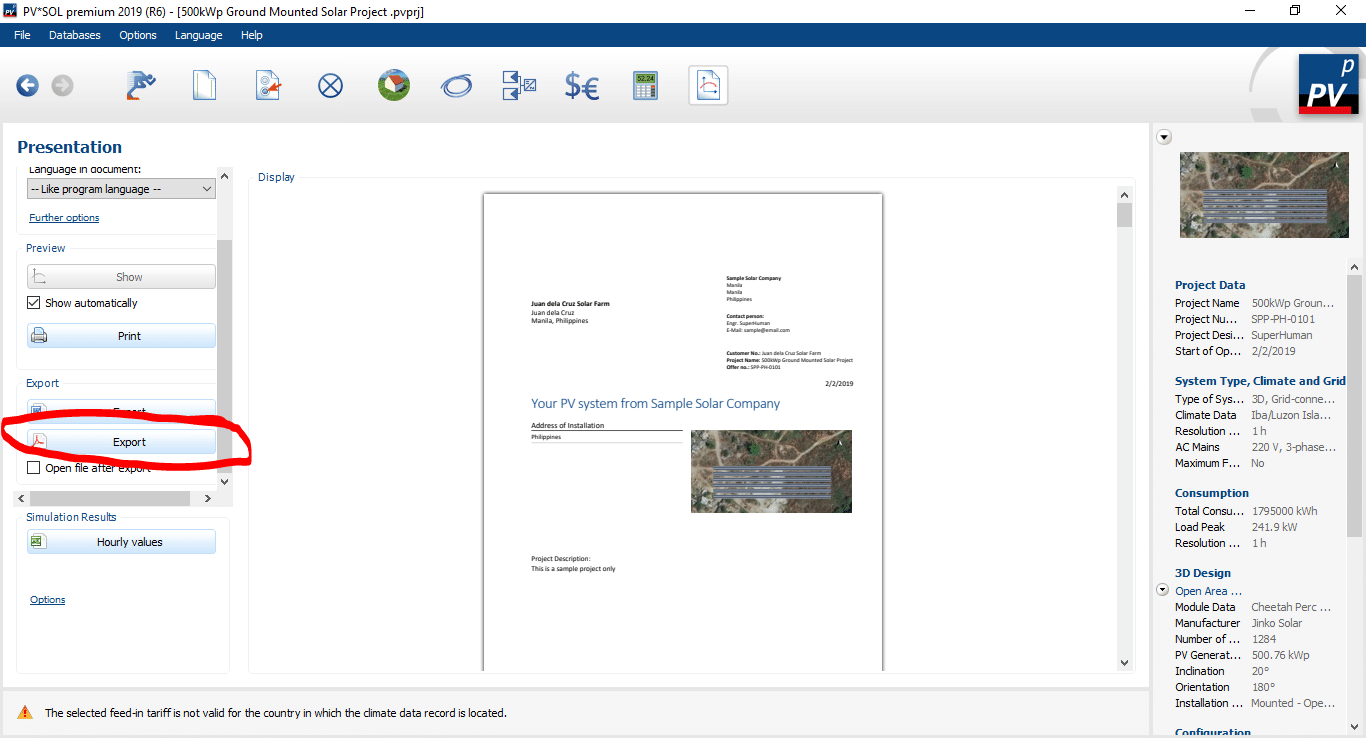
In the Financial Analysis section, choose Net Metering as our energy balance concept, assuming this is allowed by the local utility. I assumed 2% inflation only, then click select in order to configure the local tariff.Let us create a net-metering tariff here.Populate this form with the appropriate details. Add your local utility as an energy supplier.We will select the monthly accounting since this is more accurate. The price per kWh will be entered on the energy price section, which is 9.83850 (you can change this based on the accurate tariff)Hit OK to continue.Click ‘Edit’, then go to General Parameters. We will put 0 annual return on capital, assuming the buyer did not loan the payment from any bank.Select the income and expenditure, then enter 15,000,000 as the total price of the whole project.After completing the Financial Analysis section, click the next icon to simulate the solar PV system.The results will be shown here. The system will generate 683,427kWh of solar energy in one year.Clicking the results on the ‘Financial Analysis’ will show you more details. It will eventually pay itself after 2.2 years assuming all parameters are met.The last section will be about generating the project documentation or presentation.Just click on the export button and you can have this report in PDF format.
You may download the report in PDF format for this particular project on the link below.
He loves to read news and articles about renewable energy and technology. He is experienced in the solar energy industry. He loves to write articles, guides, and tutorials about solar PV technology.


? The Simplest Answer")


? The Simplest Answer")