In this blog post, the readers will be guided on how to install PVSyst software on their computers. Please note that this solar PV simulation tool will give you a 30-day free trial with full features! Disclaimer: This website is not affiliated to PVSyst in any way, this will only guide you in installing this solar PV software.
PVSyst is a computer application for modeling and simulating a solar photovoltaic system. This software is mostly used by engineers and solar enthusiasts for designing, sizing, and analyzing complete solar PV systems. The acronym stands for – Photovoltaic (PV) System (syst).
The University of Geneva in Switzerland developed PVSyst, which has now become one of the oldest and successful photovoltaic software.
To optimize the solar energy production of a PV system, solar PV engineers/designers can use PVSyst to test and simulate a combination of solar PV arrangements. With the variety of solar modules and inverters, they will be able to compare and analyze which equipment will be best to use.
Who are the founders of PVSyst? (Trivia)
André Mermoud and Michel Villoz are the founders of the solar simulation software which was developed in the year 1992. Mermoud is a graduate of the University of Geneva (1971) and he obtained his Ph.D. in particle physics in 1977 following research at CERN. Villoz graduated from EPFL (Ecole Polytechnique Fédérale de Lausanne) with a diploma in electrical engineering.
As of 2020, Mermoud is still actively involved in developing PVSyst. On the other hand, Villoz provides in-house PV training at PVsyst while working in the PV engineering field as an independent consultant.
Main Features of PVSyst
The main attributes of PVSyst are the reasons why it is so popular with solar PV engineers, architects, and designs. Listed below are the main features of this photovoltaic software.
Here is the list of minimum requirements to install PVSyst on your computer.
Operating Systems
All Windows client versions currently supported by Microsoft: Windows 8, Windows 10 (32-bit or 64-bit)
or Up-to-date Windows 7 systems
Other OS like MAC OS X and LINUX are supported through the use of a virtual machine running Windows.
Computer Hardware
At least 1 GB of RAM
At least 1 GB of free hard drive space
Minimal screen resolution of 800 x 600 pixels (SVGA)
.NET 4.5 framework (installed by Windows Update)
Graphics card supporting OpenGL 2.0 or higher
Moreover, this software currently does not support the following OS. – Windows servers, Application servers (Citrix, ZenDesktop, ZenApp,…)
How to install PVSyst Software – Easy Steps
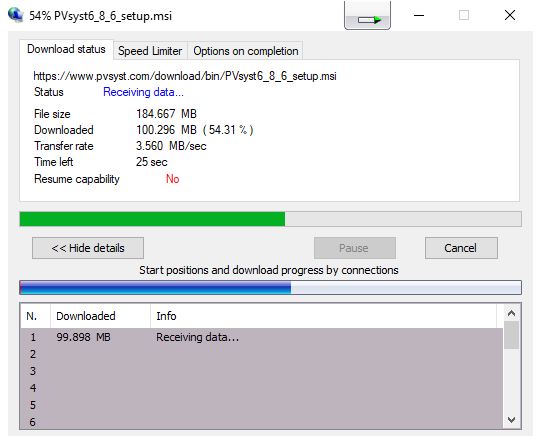
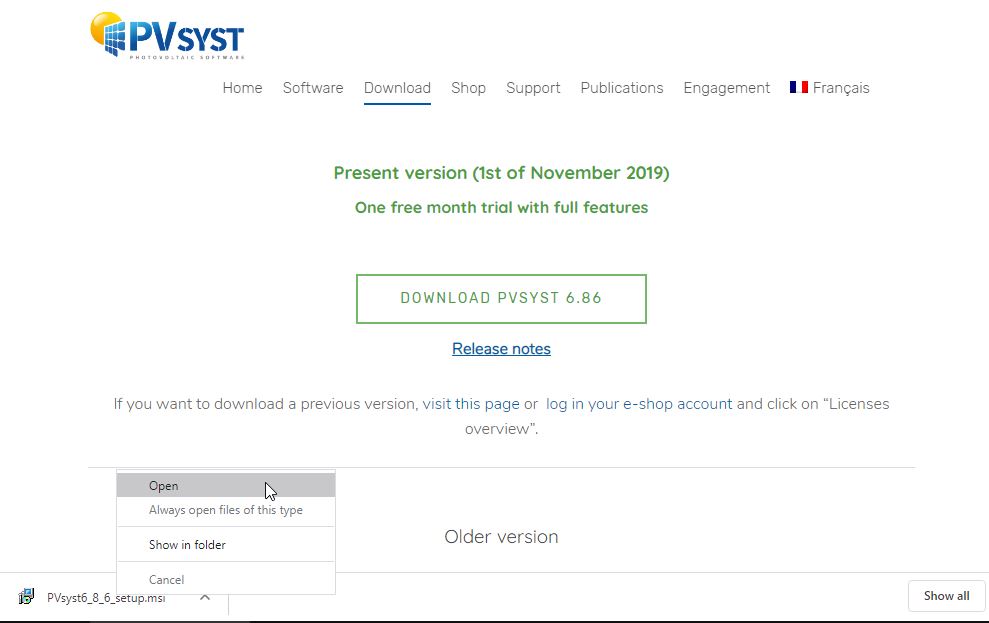
Download the PVSyst installation package from their official website. Or, you can directly use this download link here (version 6.86).You can use your preferred download manager to do this. Modern web browsers have their download managers. But, you can also use some popular applications like Internet Download Manager as seen in the image below.
Once the file download is complete, double click on the installation package to start the process.
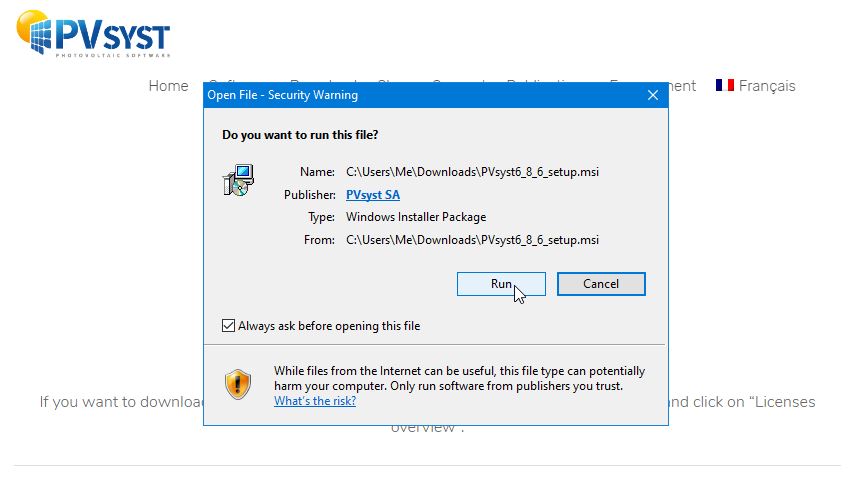
After opening the PVSyst installation file, you might be prompted by a warning message. Just click “Run”.
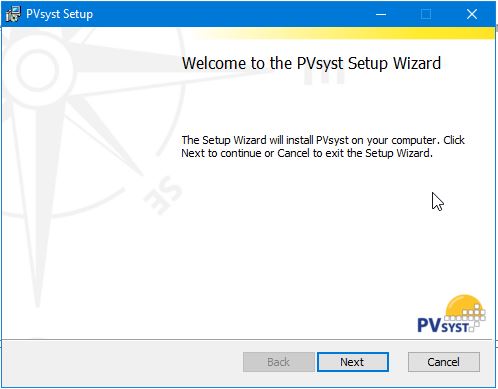
Then, you will see the PVSyst installation wizard window after doing the previous step. Click “Next”.
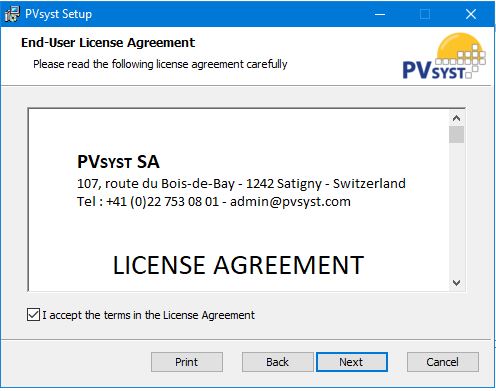
The next step is to read the PVSyst license agreement. After that, you may click the checkbox on the lower left-hand side of the setup window. Then, click “Next” again.
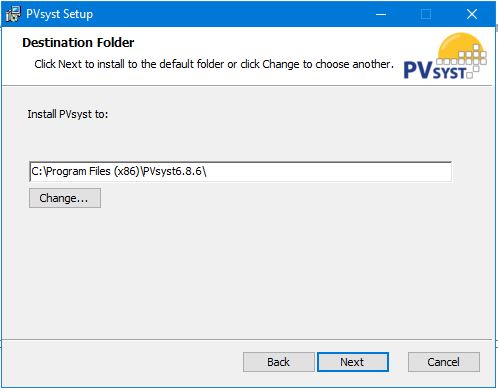
Although this is optional, you can select your preferred installation folder on the next step. If the default folder is fine or you have selected your preferred folder, then, click “Next”.
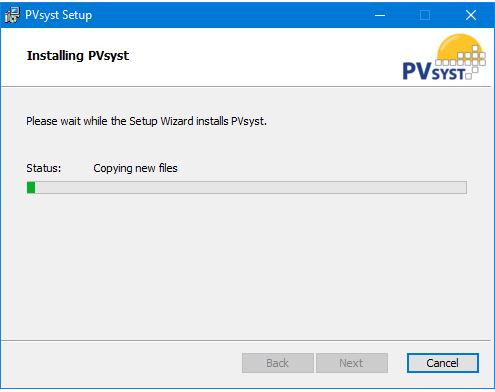
The next step will be to click the “Install” button.
Then, the installation wizard will start extracting and installing the necessary files to your system. This will take a few minutes.
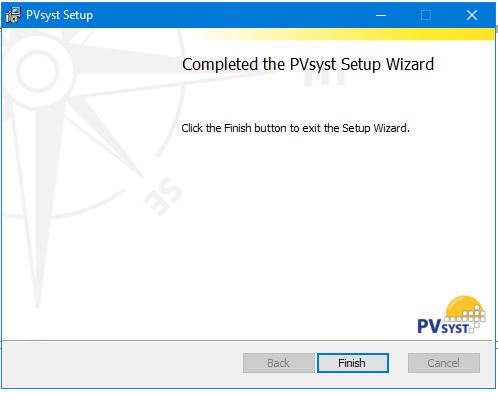
After that, the installation wizard will tell you that the process is now complete. Click “Finish”.
During the first time opening the PVSyst software, you will be asked to select your preferred folder. This folder will store all the data for your solar PV designs. You can click “OK” once choosing the folder is done.
Congratulations! You have just installed the simulation tool on your computer. Now, you can start creating solar PV designs. You will also be able to use this software to create solar energy reports for your PV projects.
What is good with PVSyst?
Once you master this powerful solar PV design tool, creating solar project reports will be easier for you. Whether it be an on-grid, off-grid, or hybrid solar project, PVSyst will be of great help in optimizing your PV system.
Here are some of the things that engineers and designers like about PVSyst:
This tool has a flexible database for solar PV equipment.
It has the option to do shading analysis with 3D objects.
It also supports multi-azimuths and solar trackers.
Simulation reports using this tool are informative.
It is one of the most trusted simulation software available in the market.
Most consultants and project owners require design and simulation using this PV design tool.
PV system reports are customize-able.
Economic evaluation.
What needs improvement with this tool?
Although this solar PV software is very powerful, it is still far from being perfect as of the moment. Here are some of the areas PVSyst can still improve on:
It is not so user-friendly. Creating an easier process flow in designing PV systems will greatly improve this tool.
The user interface looks a bit older than other PV design tools.
The 3D shading analysis tool is not intended for newbies.
Very limited integration of 3D object files.
There is no web-based version of the software.
Mastering this tool requires a lot more time and practice compared to other solar PV software.
Is PVSyst free to use?
As mentioned in the first few paragraphs, PVSyst is not free software. Although they give you a 30-day trial period, they still require you to pay for the software after some time.
PVSyst cost
According to their official website, this tool will cost you CHF1000 (or 1041USD) for a PRO30 license or CHF1300 (or 1353USD) for a PREMIUM license. A license will give you access to the full features of PVSyst for a 1-year period only.PRO30 is limited to 30kW projects while the
PRO30 is limited to 30kW projects while the PREMIUM license does not have any kW limits.
Video Tutorials for PVSyst – Step by Step
Installation Video Tutorial + Basic Introduction for Beginners
Updating Components Database for PVSyst
PVSyst 3D Shading Scenes Video Tutorial
Conclusion
Now, you learned how to install the PVSyst software. You can start creating simulations and designs for your solar PV projects. Spend a few hours or days tinkering with this software and you will be able to master using PVSyst.
Is it a good investment to buy a PVSyst license? Whether you want to use it for your business or personal projects, deciding to obtain a license will really boil down to your specific needs. Nevertheless, learning how to use this tool certainly gives value to any solar PV enthusiast.
He loves to read news and articles about renewable energy and technology. He is experienced in the solar energy industry. He loves to write articles, guides, and tutorials about solar PV technology.


 Technology - 2024 Update")